

VM Analytics has been a beloved feature of Pure1® Manage; however, historically, it has only worked with IPv4 IP protocol. With IPv4 addresses being exhausted around the globe, a growing number of customers are moving their infrastructure to IPv6; and unfortunately, they cannot continue to use VM Analytics in the new environment due to lack of IPv6 support.
However, this is no longer a problem. Since Pure Storage® Virtual Appliance (the common OVA) version 4.1.1 and VM Analytics Collector version 3.3.0, VM Analytics is fully functional with IPv6 static networking. Let’s now explore how an end user can enjoy this feature.
Deploy an OVA with IPv6 Static Network
As you may recall from my previous blog posts, in order to set up a VM Analytics Collector, a user needs to first deploy the OVA and then configure the VM Analytics Collector application.
For the prerequisites and the download link of the OVA, refer to the corresponding section of the blog post, “Deploy VM Analytics Collector on the Pure Storage Virtual Appliance.”
Deploy the OVA
Note: Screenshots in this section are taken from vSphere 7.0. Your environment may look slightly different depending on the vSphere version you have.
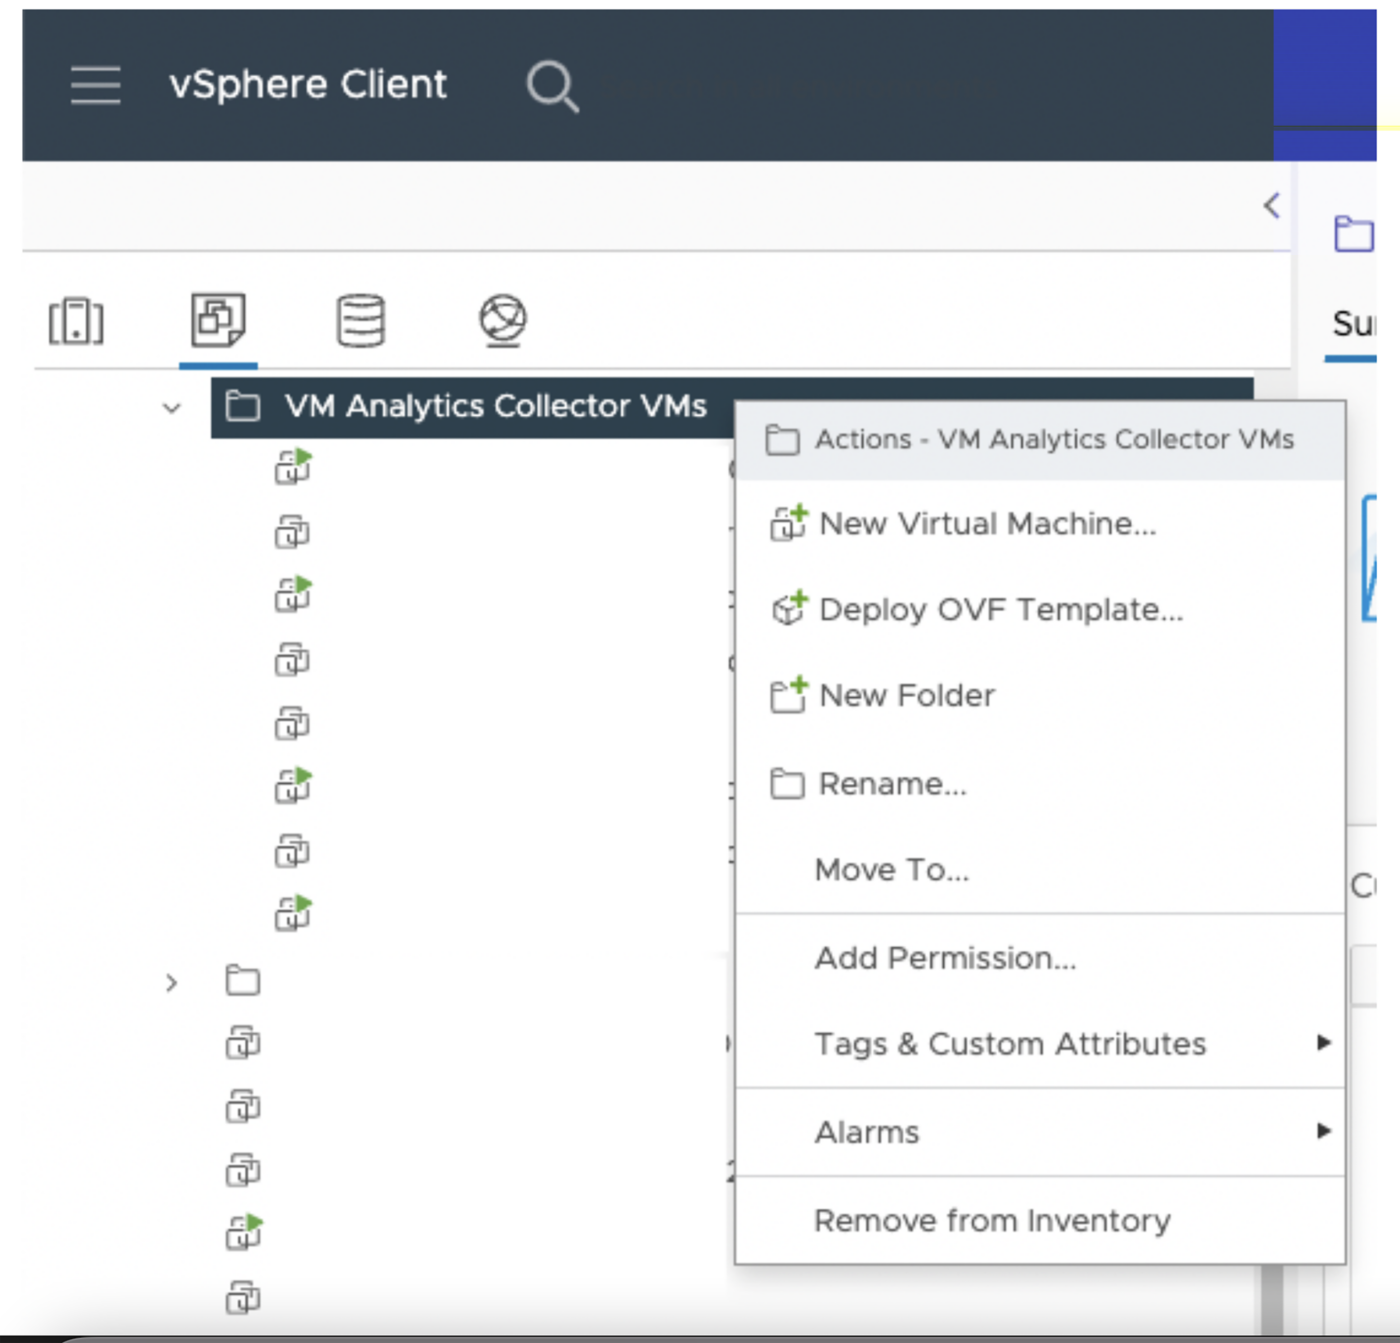
- Log in to the vSphere where the OVA is going to be deployed and then decide on a target location for the OVA. Right-click on the target location, then select Deploy OVF Template.
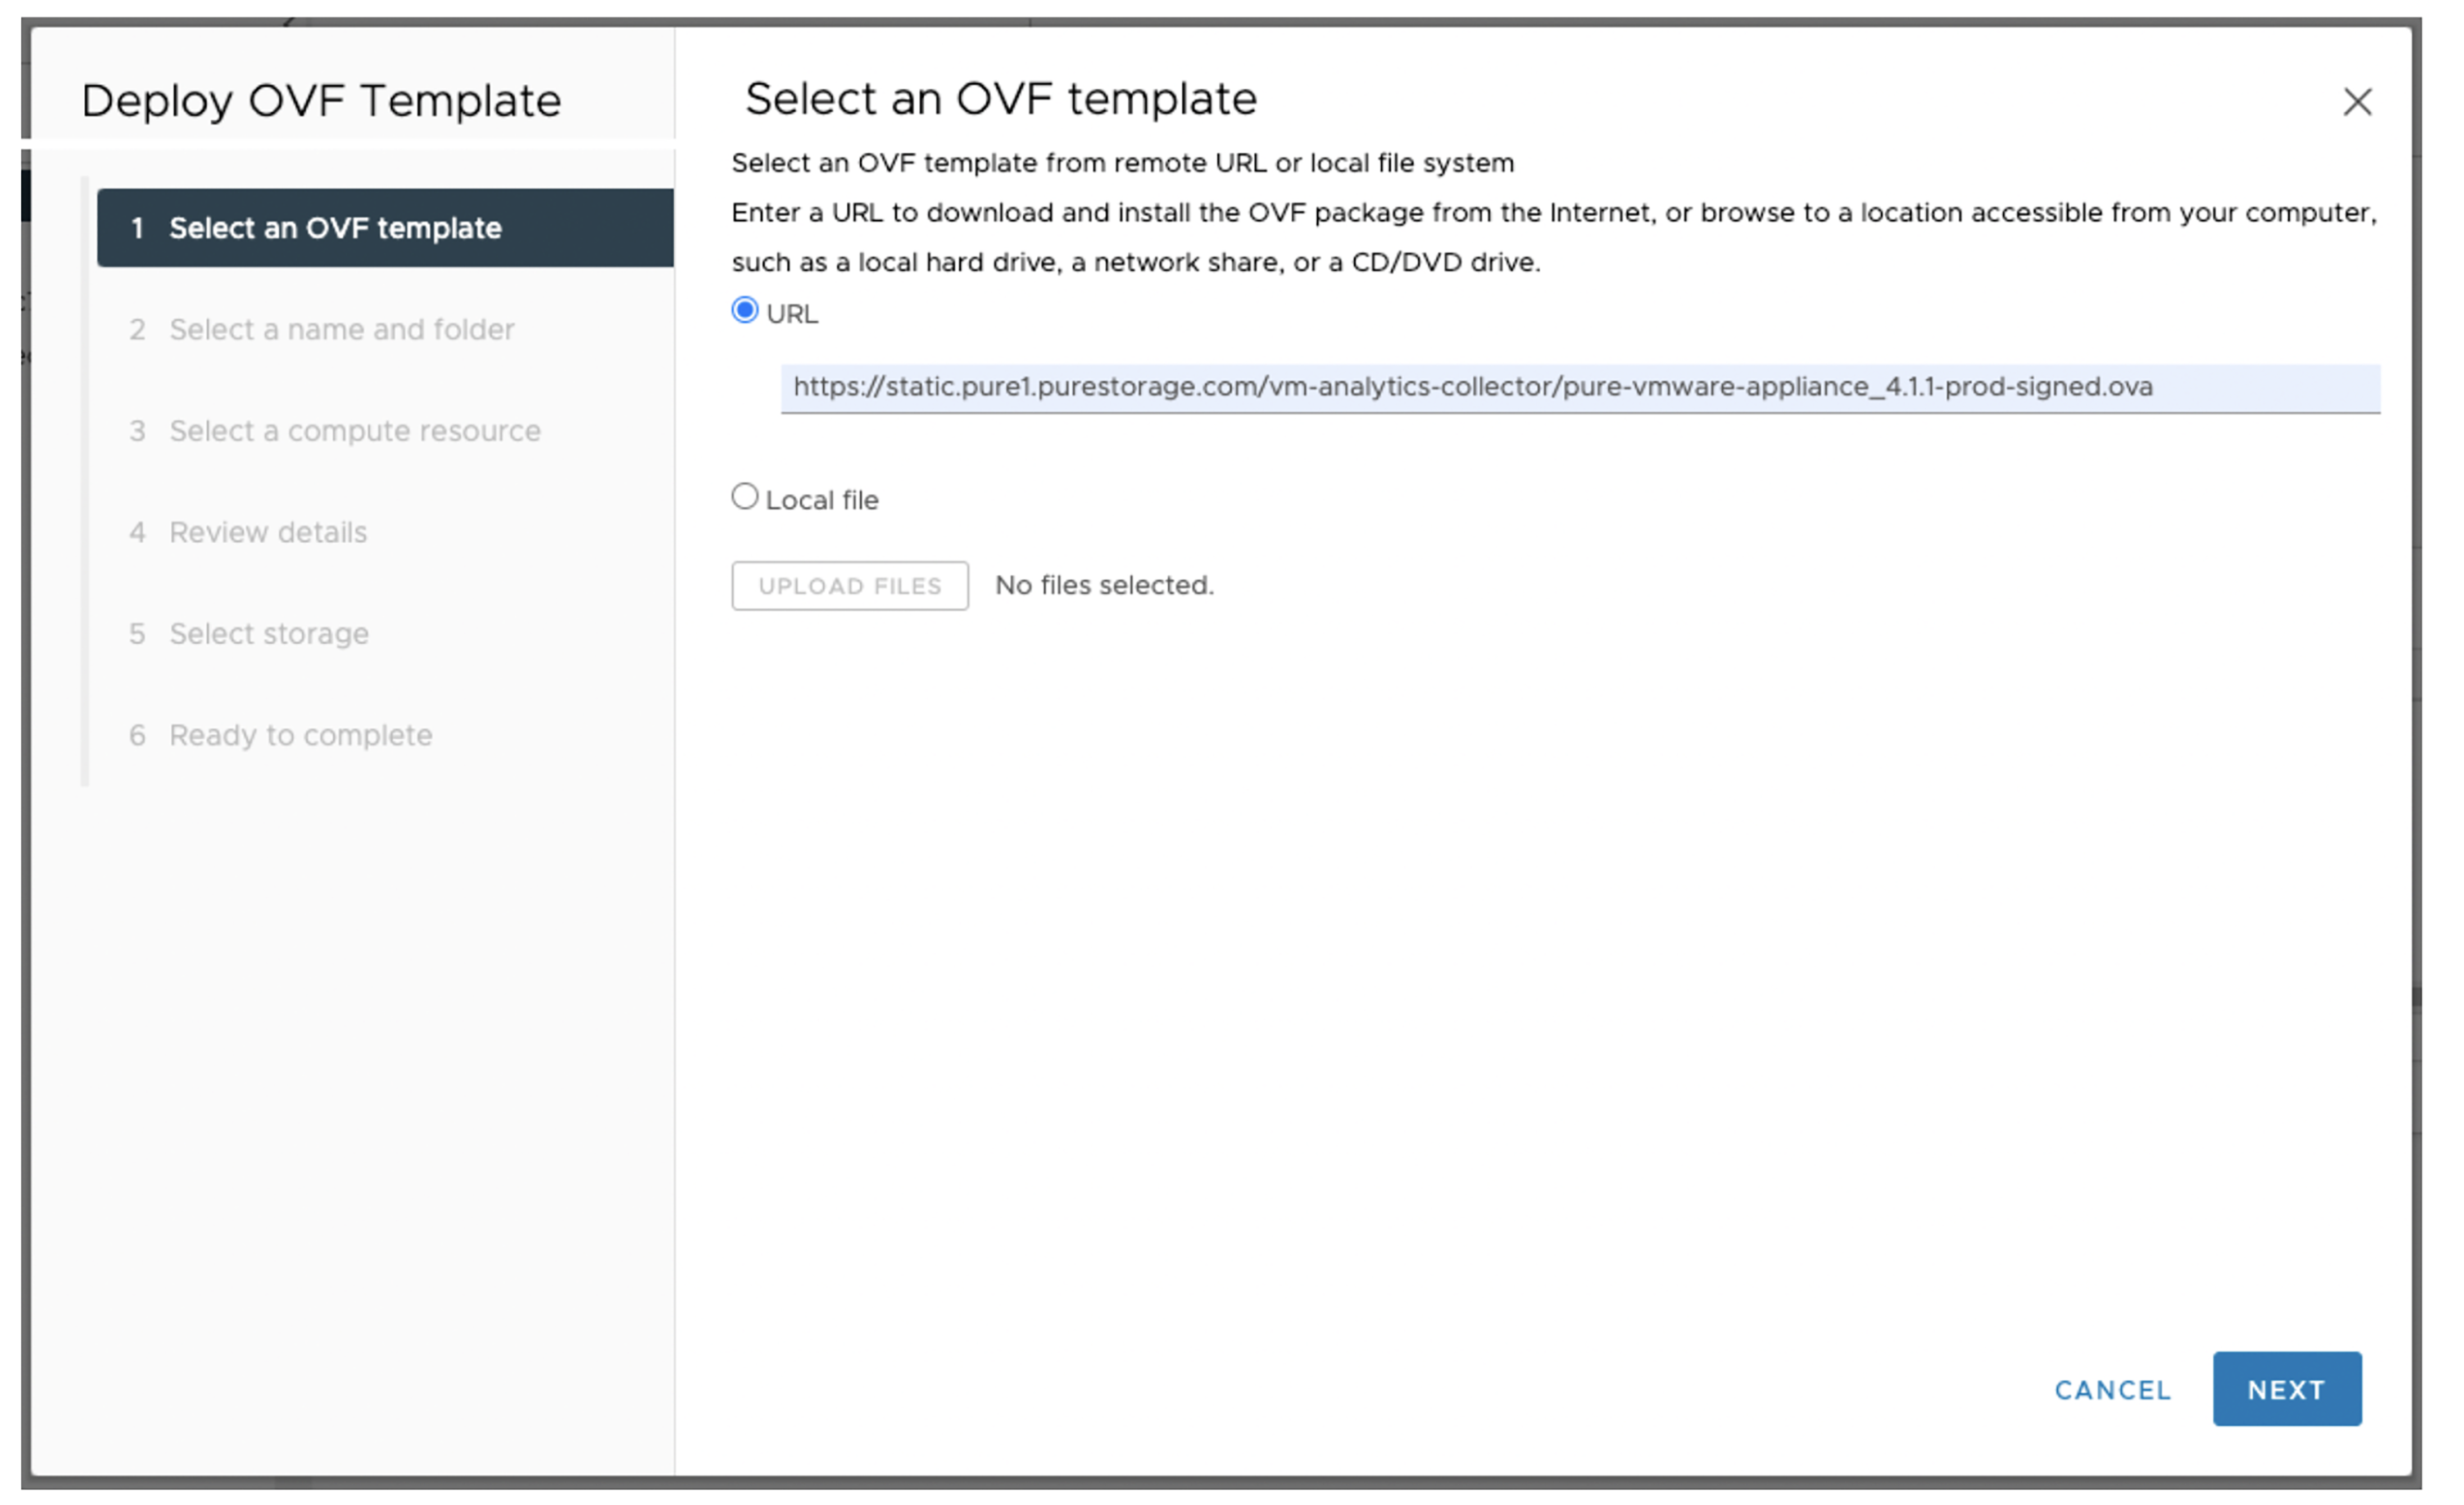
- Paste the OVA download link which is retrieved from the Pure1 Manage – Virtual Machines page. Alternatively, you can download the OVF file from the link first, then upload it to the vSphere from your local file system.
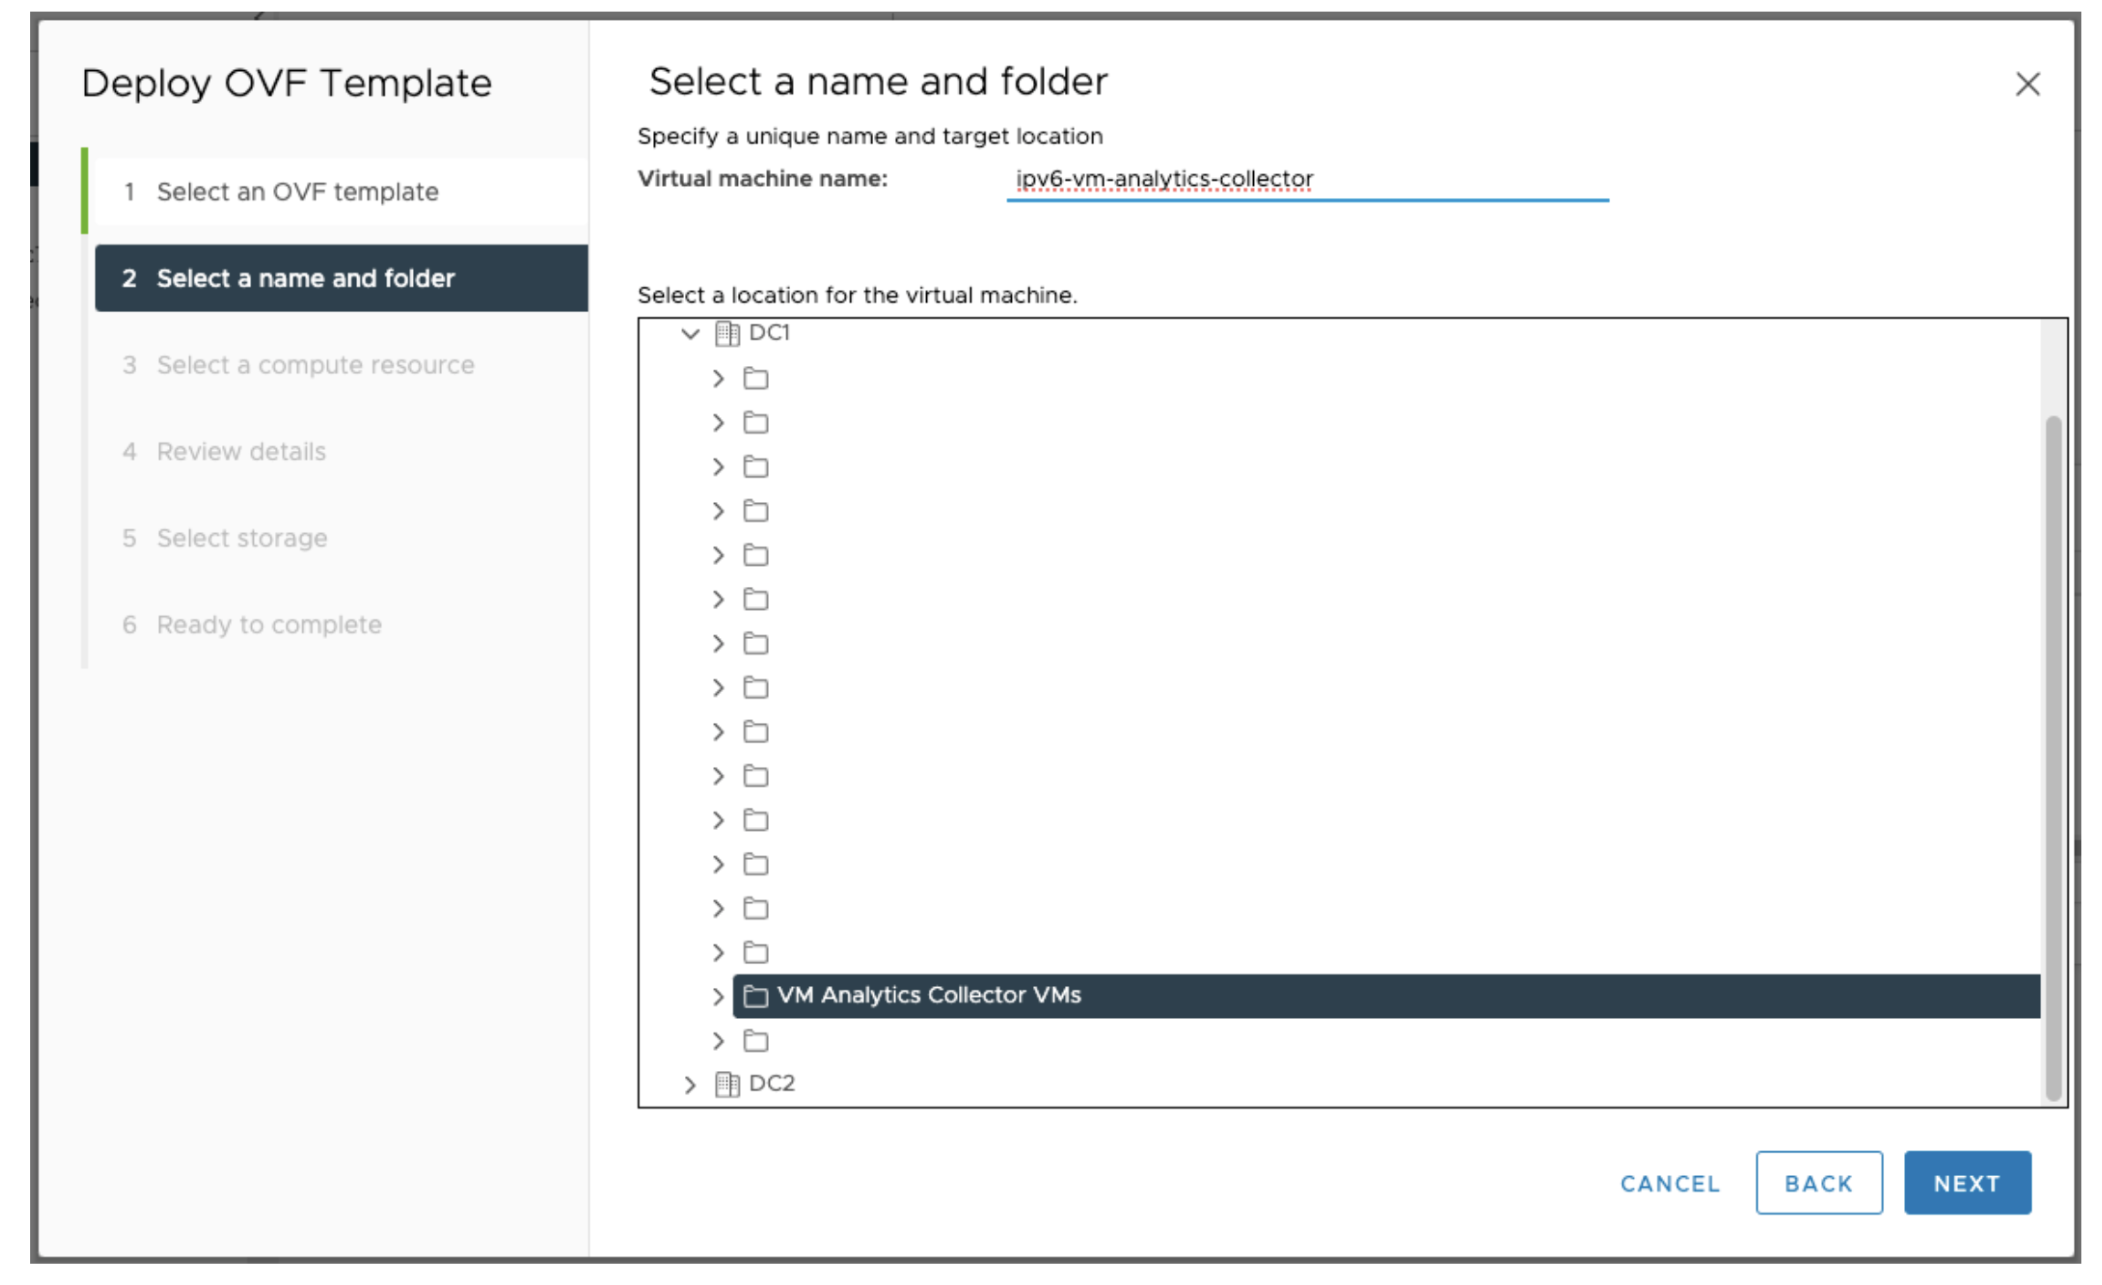
- Put the OVA into a desired folder, then give it a name.
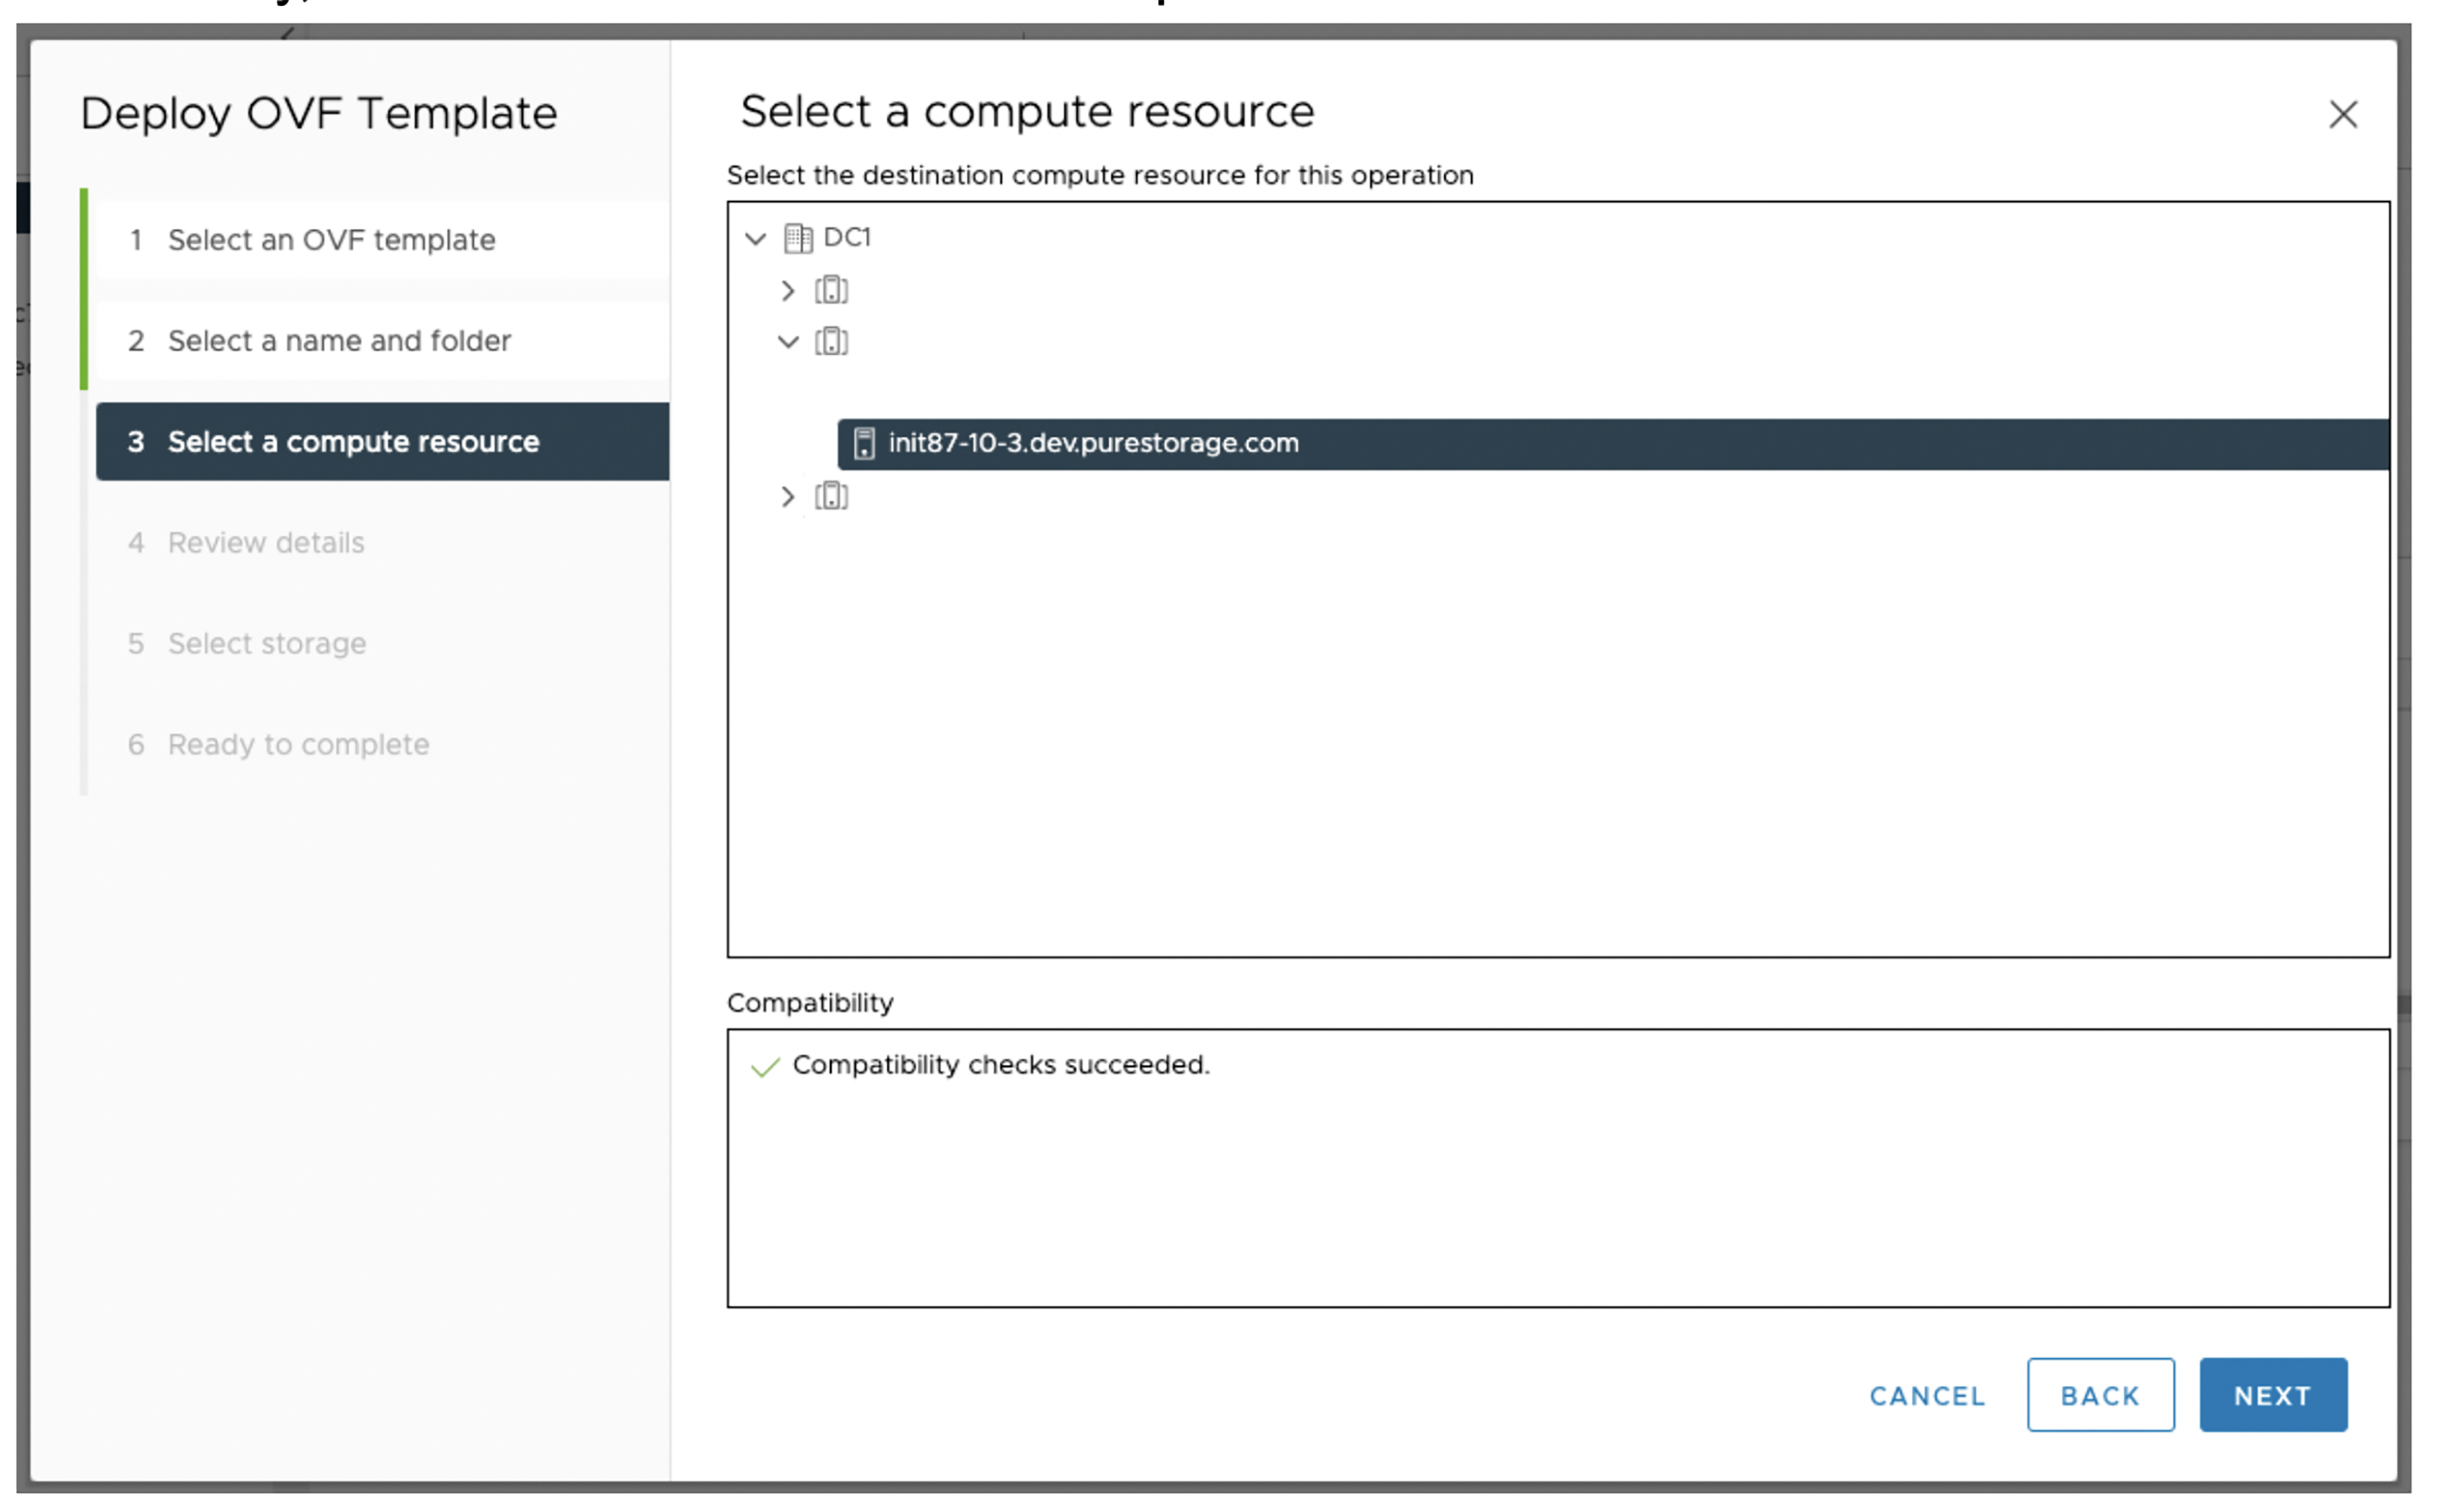
- Select a compute resource (a host). Keep in mind that the OVA needs four vCPU and 8G memory, and the host must meet these requirements.
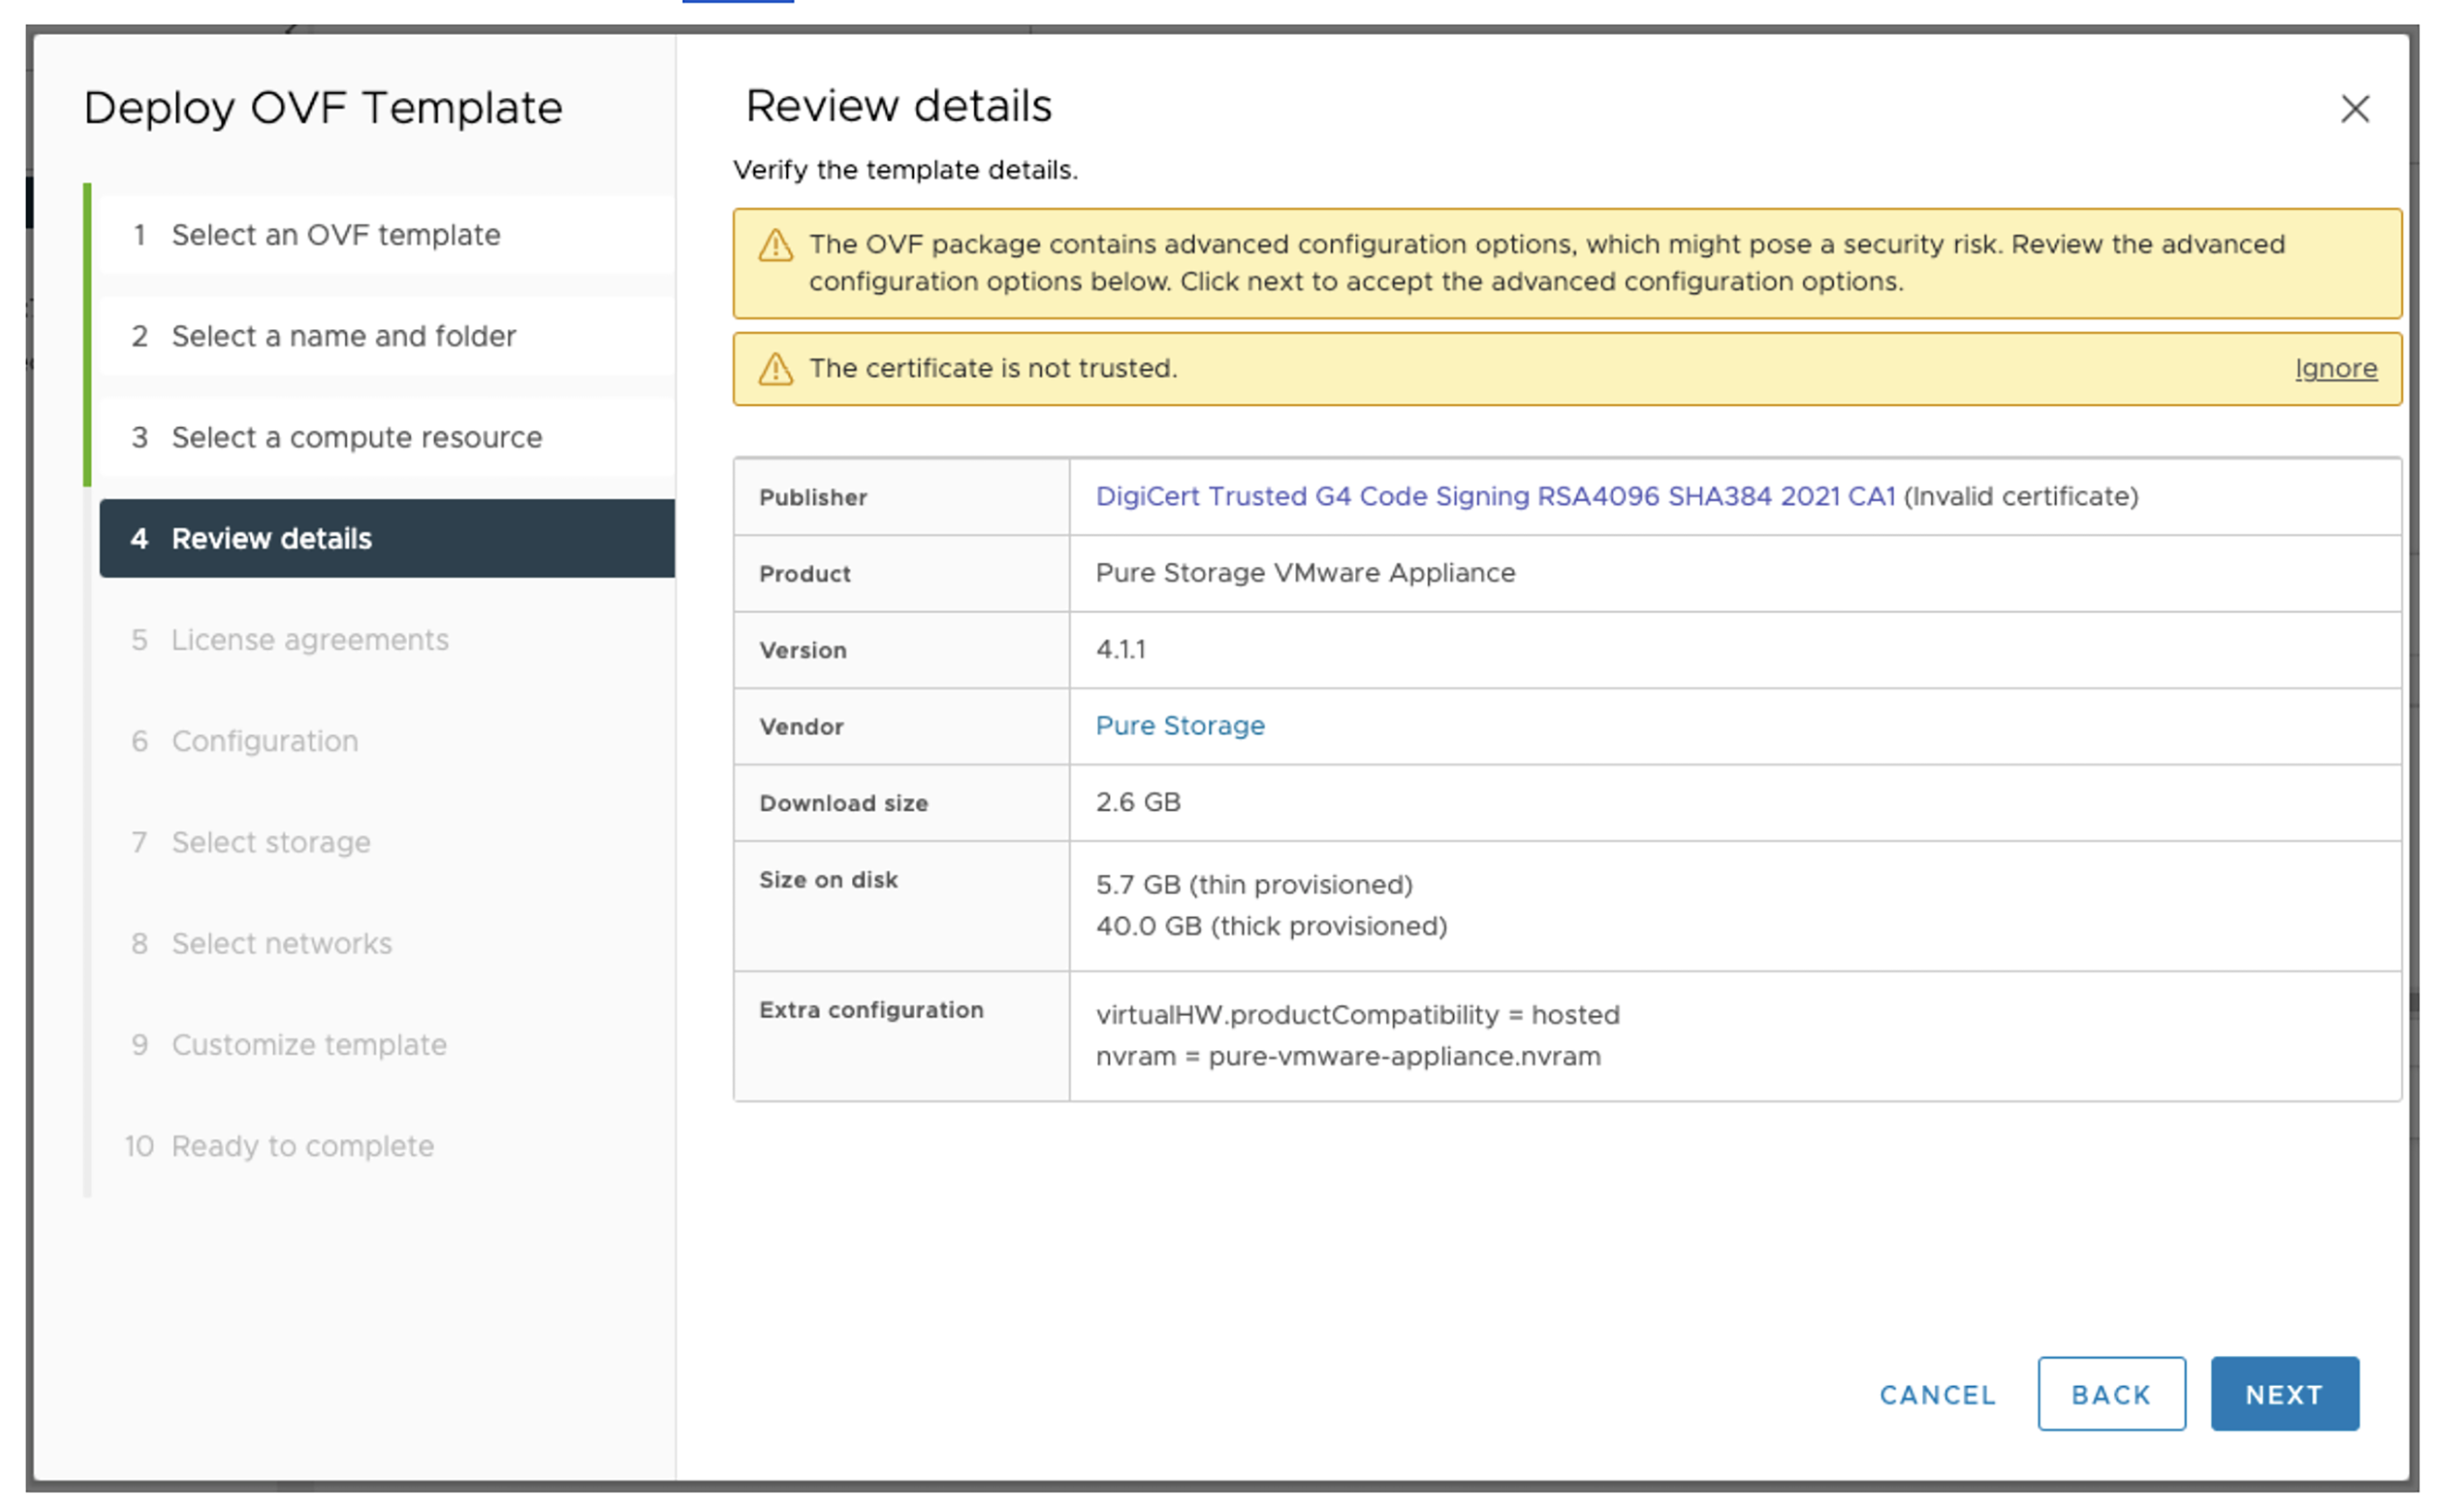
- On the next screen, you’ll review the OVA details. You may see an invalid certificate warning like the one shown below. Don’t worry, that’s a known issue that happens only on vSphere version 7.0U2+. It’s safe to ignore the warning, and if you want to resolve it, refer to VMware’s solution here.
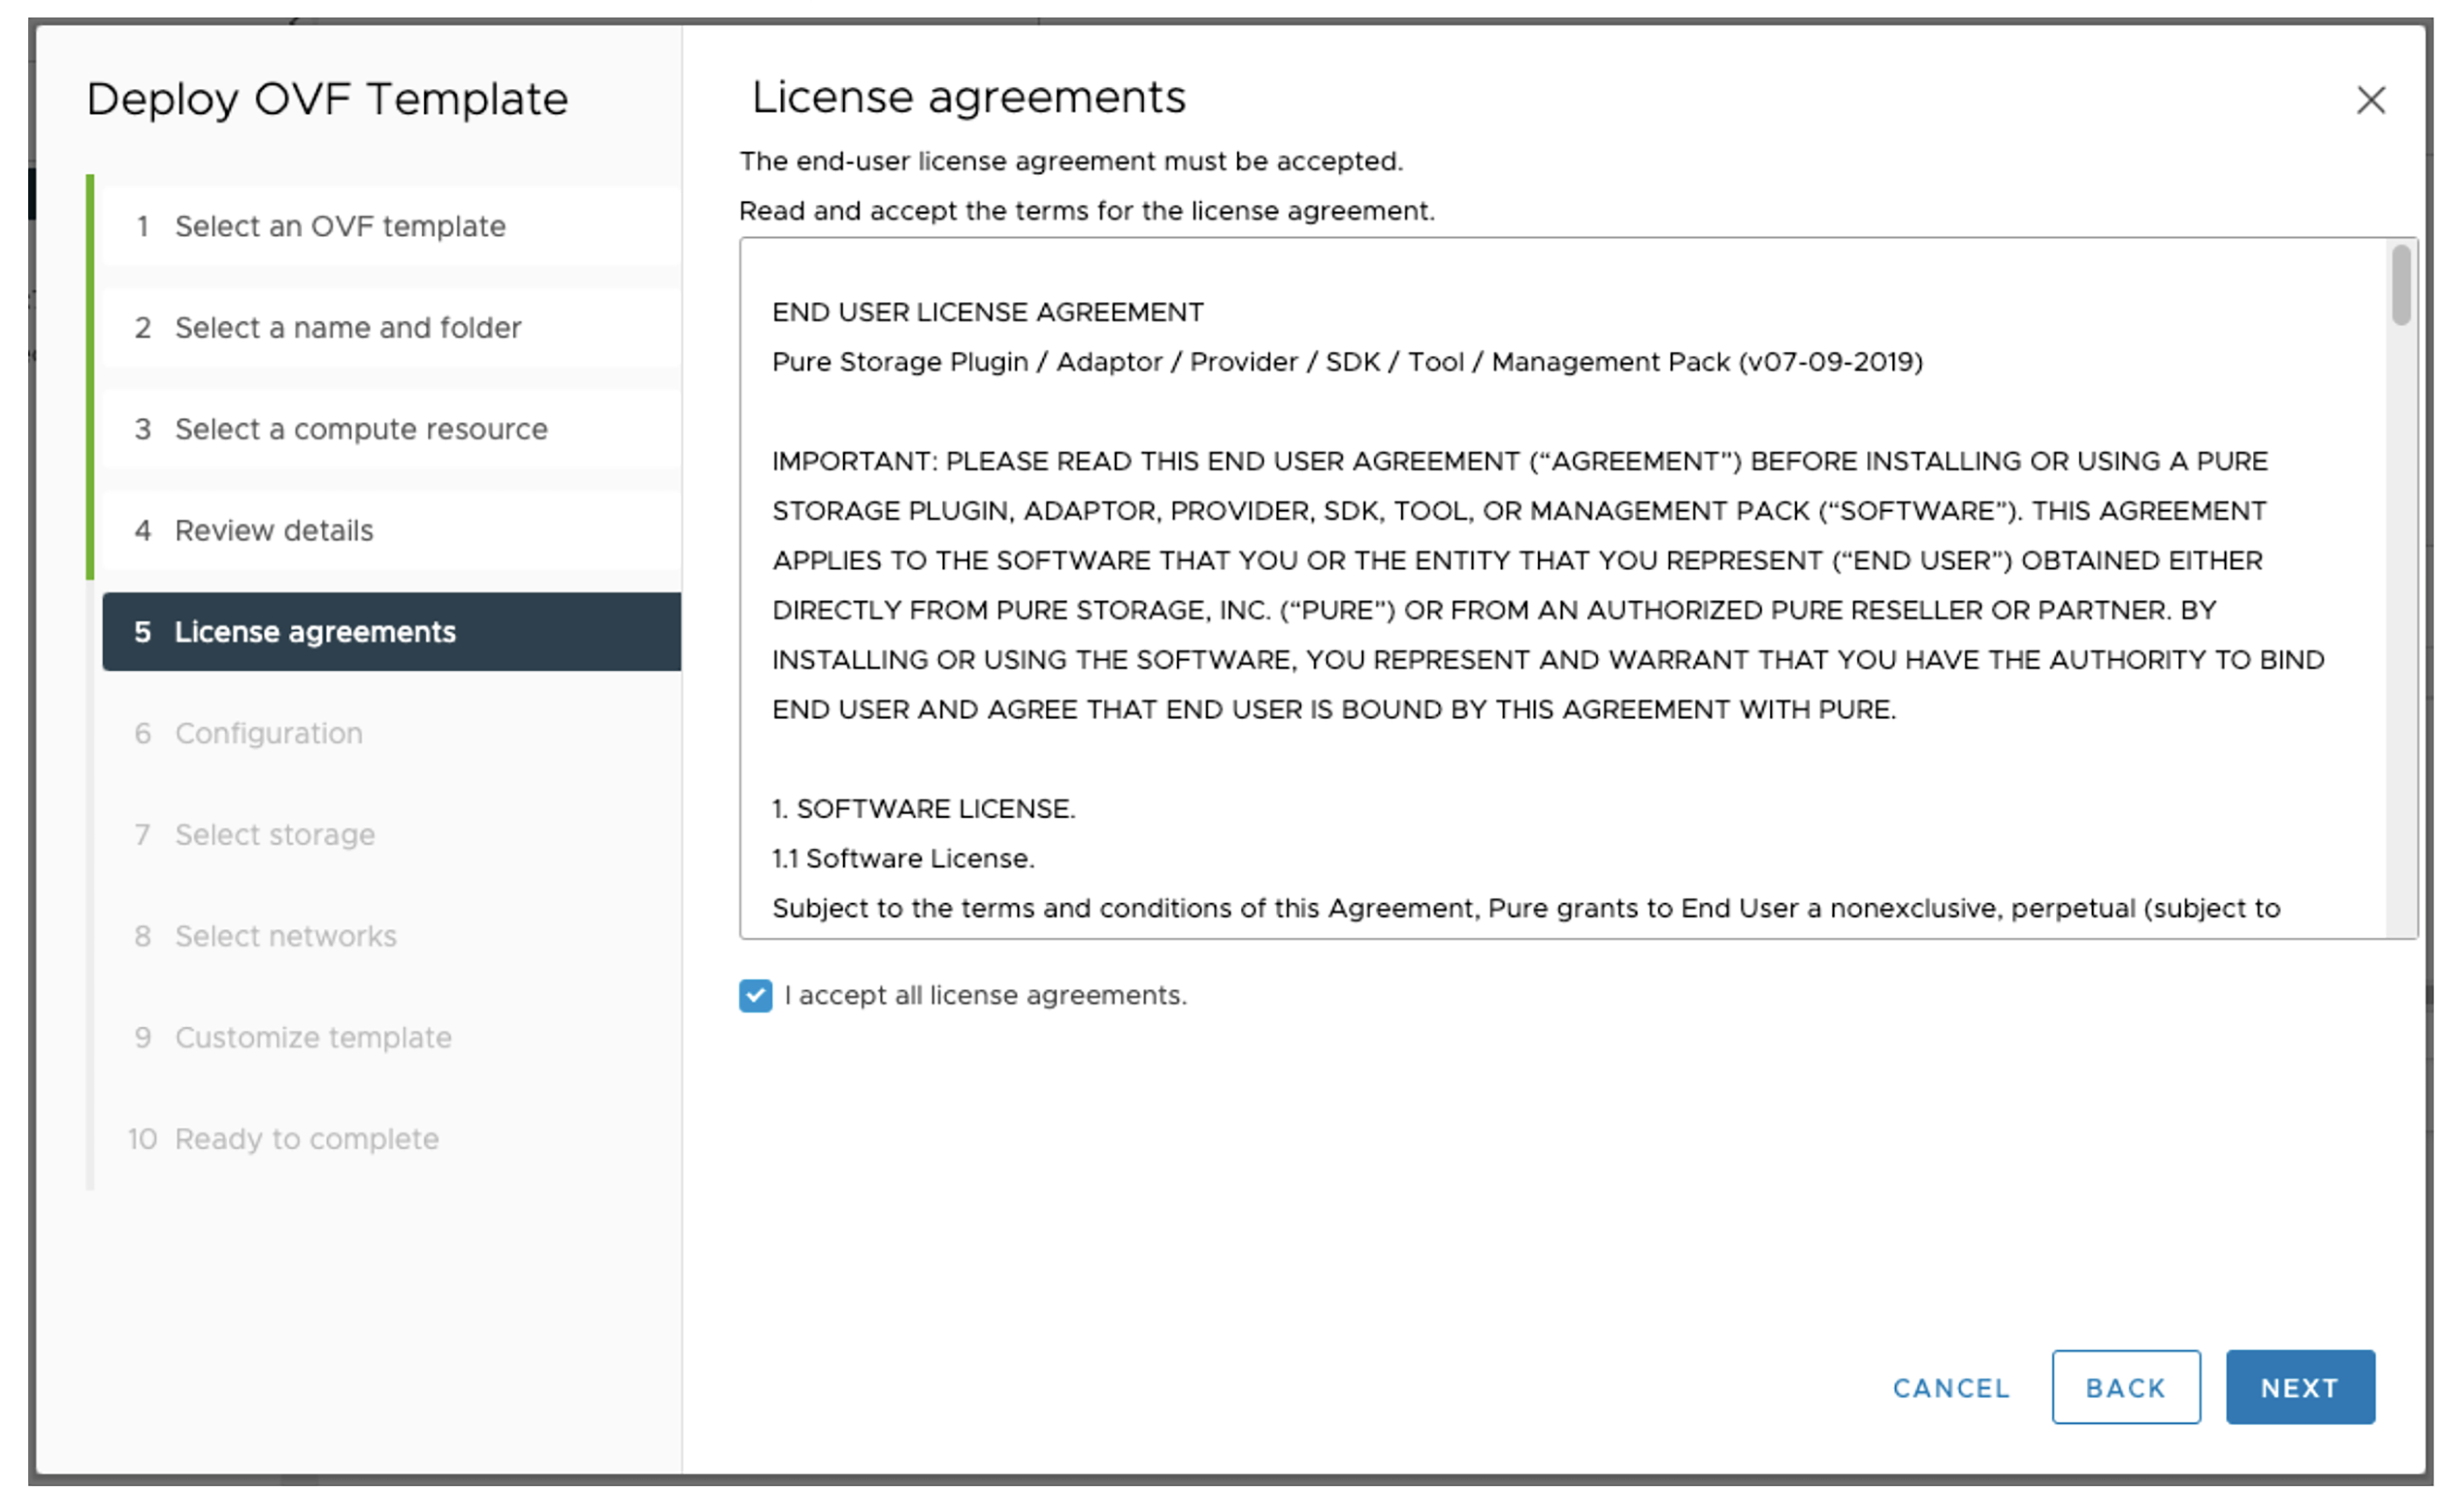
- Review and accept license usage on the next screen.
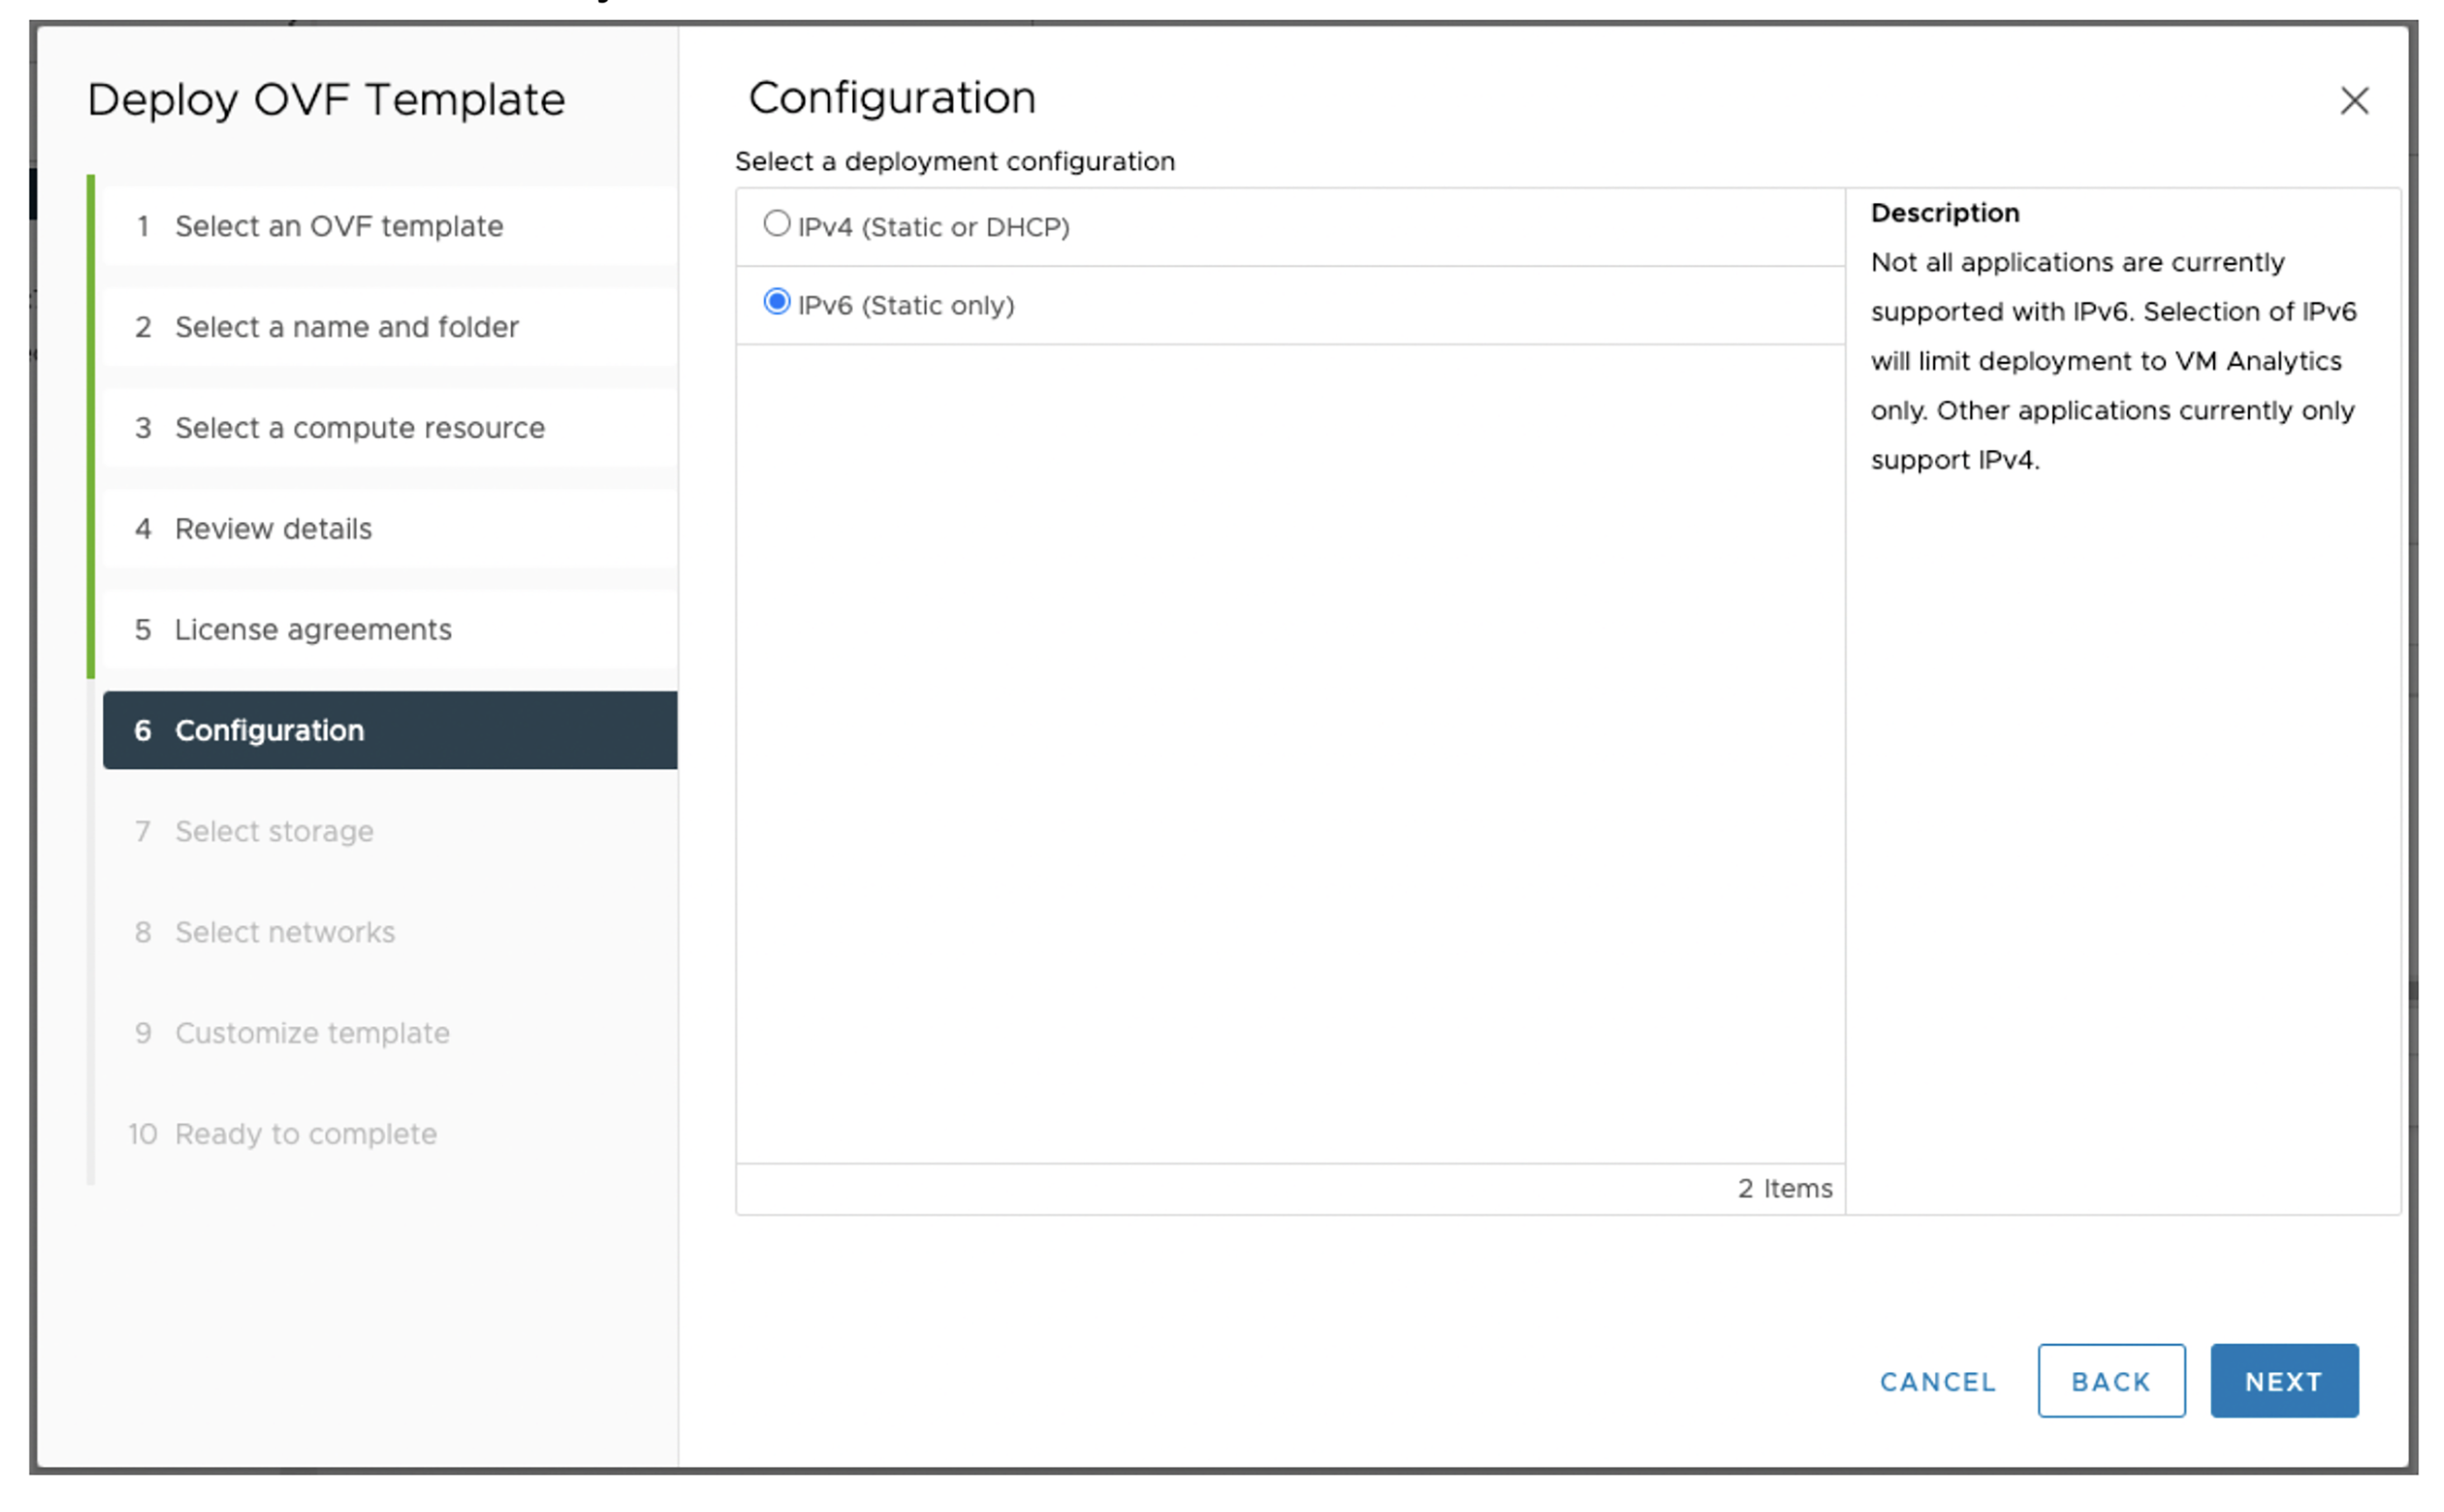
- The next screen is a new one in OVA v4.1.1. It asks you to select whether to configure the OVA with IPv4 or IPv6 protocol. This screen also clearly shows users that all OVA applications support IPv4 protocol, but only the VM Analytics Collector application supports IPv6 protocol. Also, be aware that the OVA currently does not support dual stack. It can only be either IPv4 or IPv6.
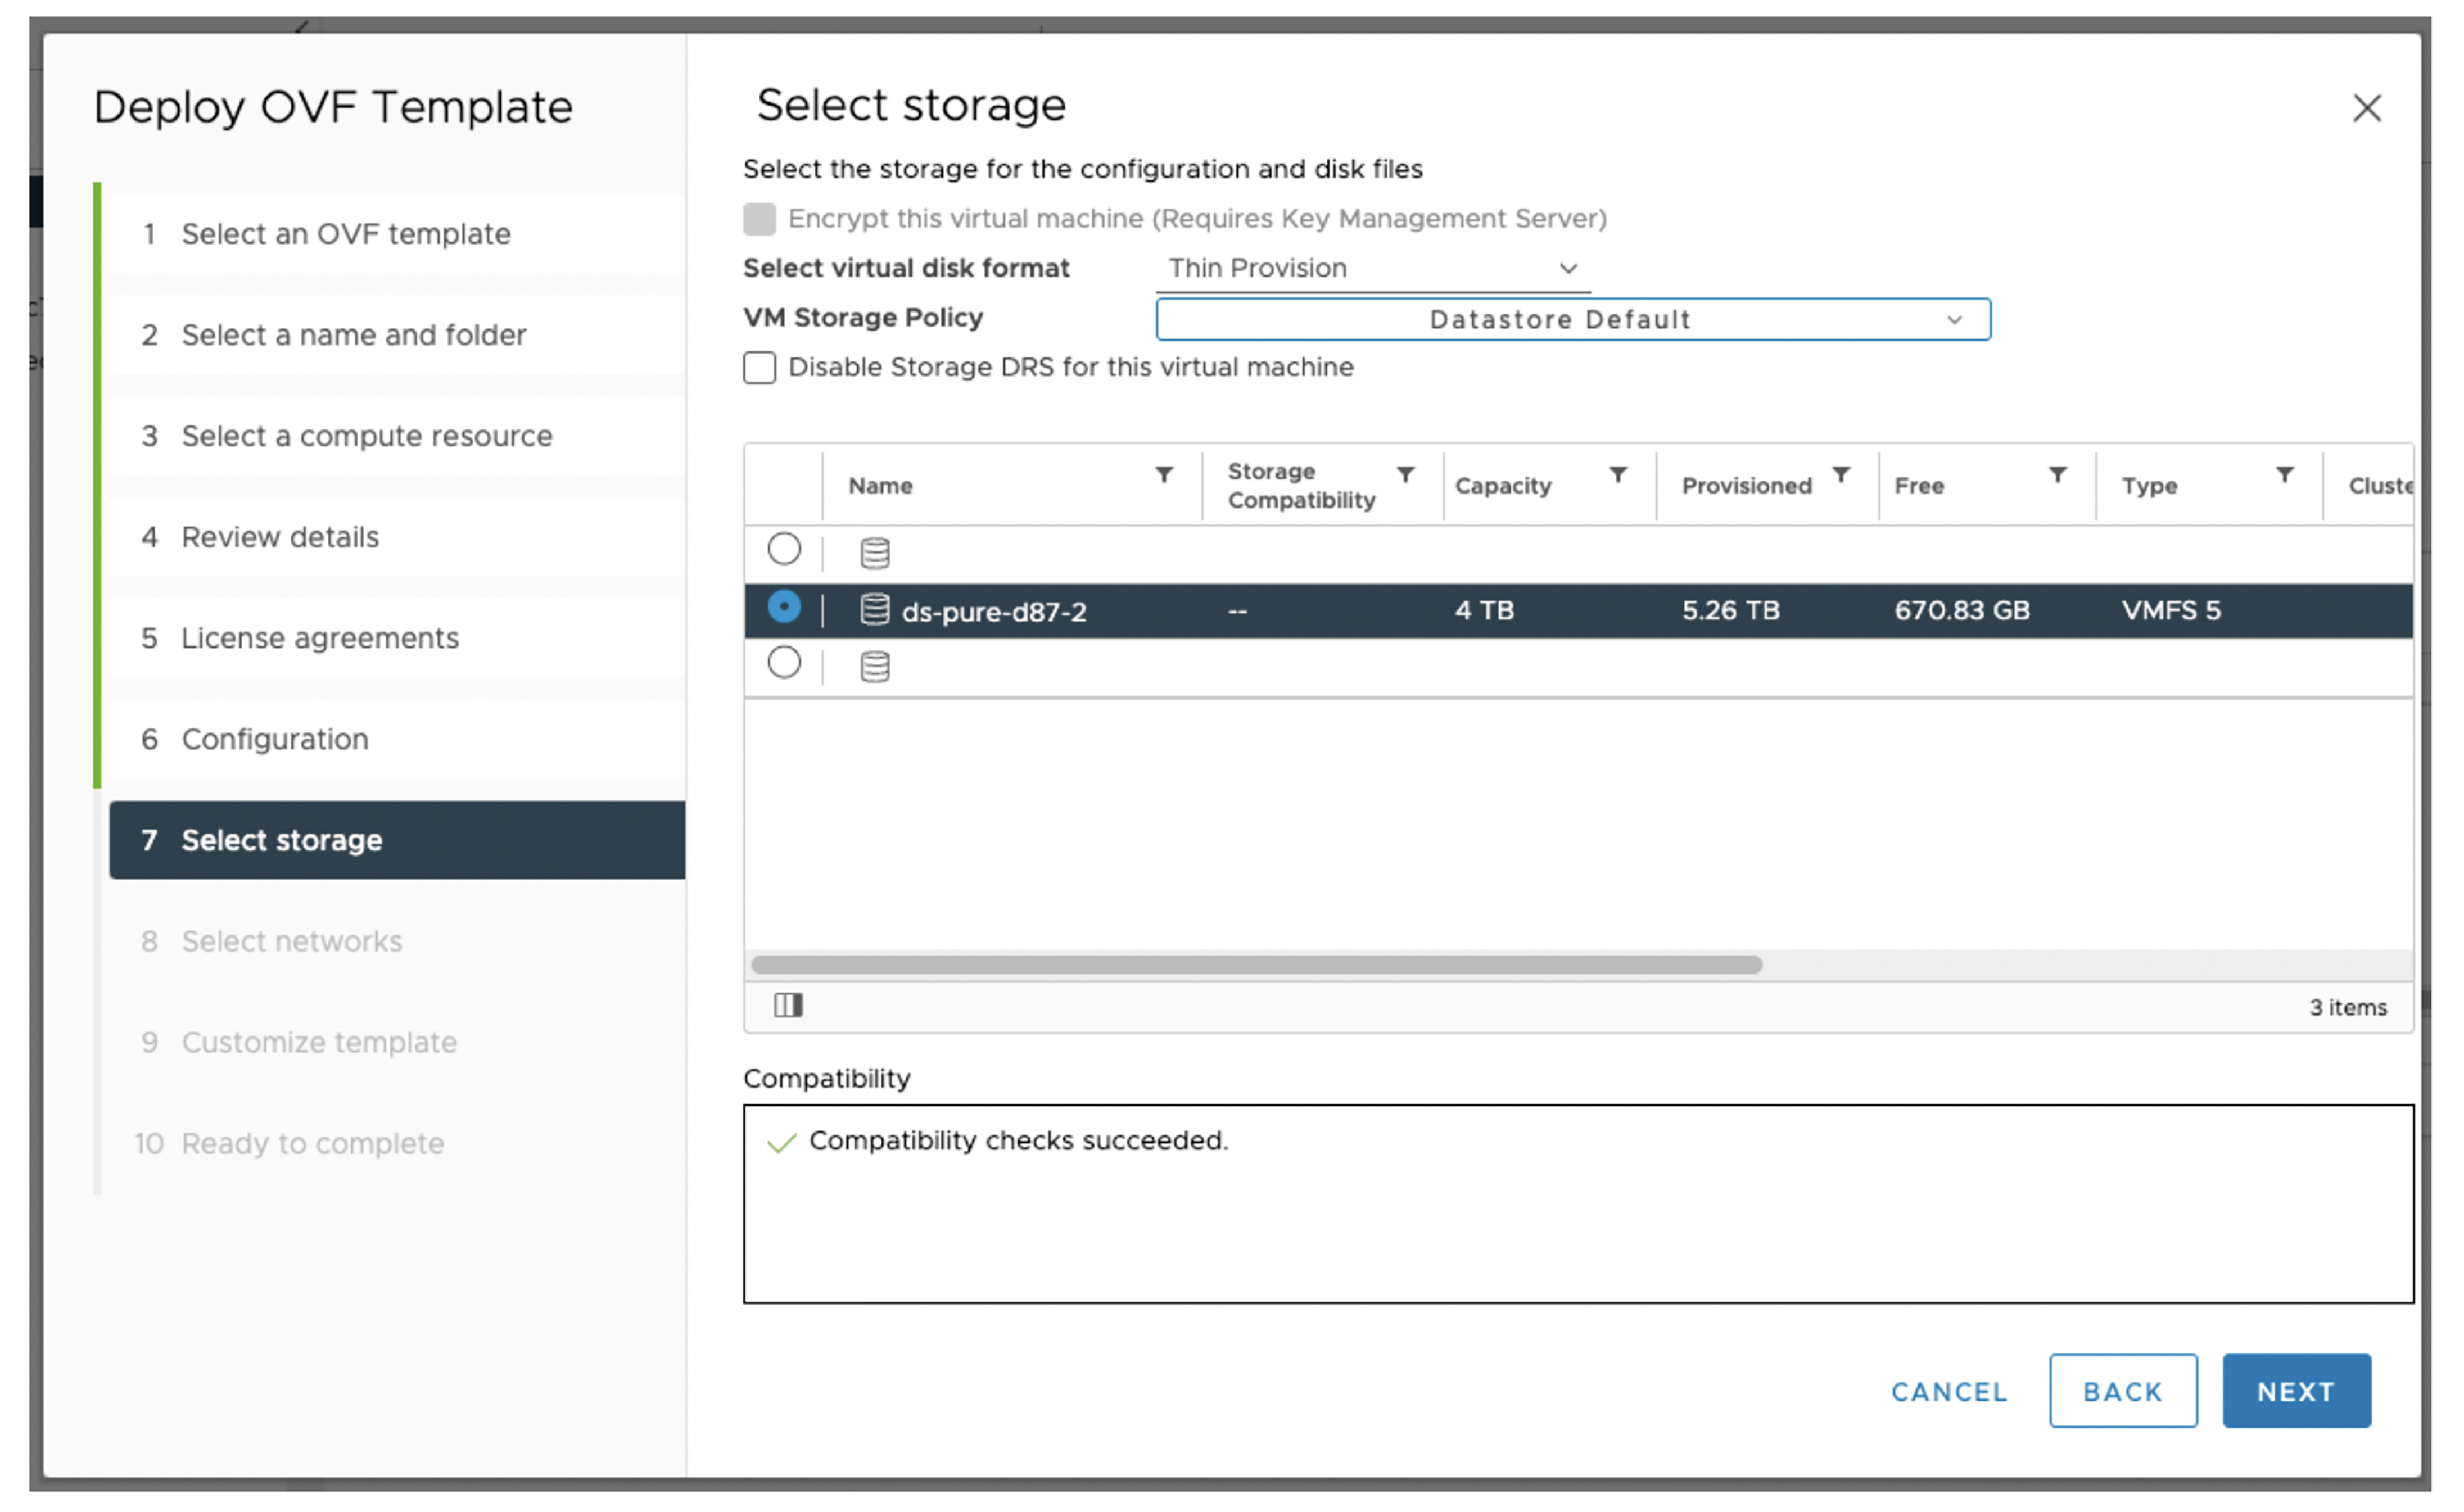
- Now, it’s time to provide storage for the OVA. As a reminder, the OVA needs at least 40GB if you’re choosing thick provisioning.
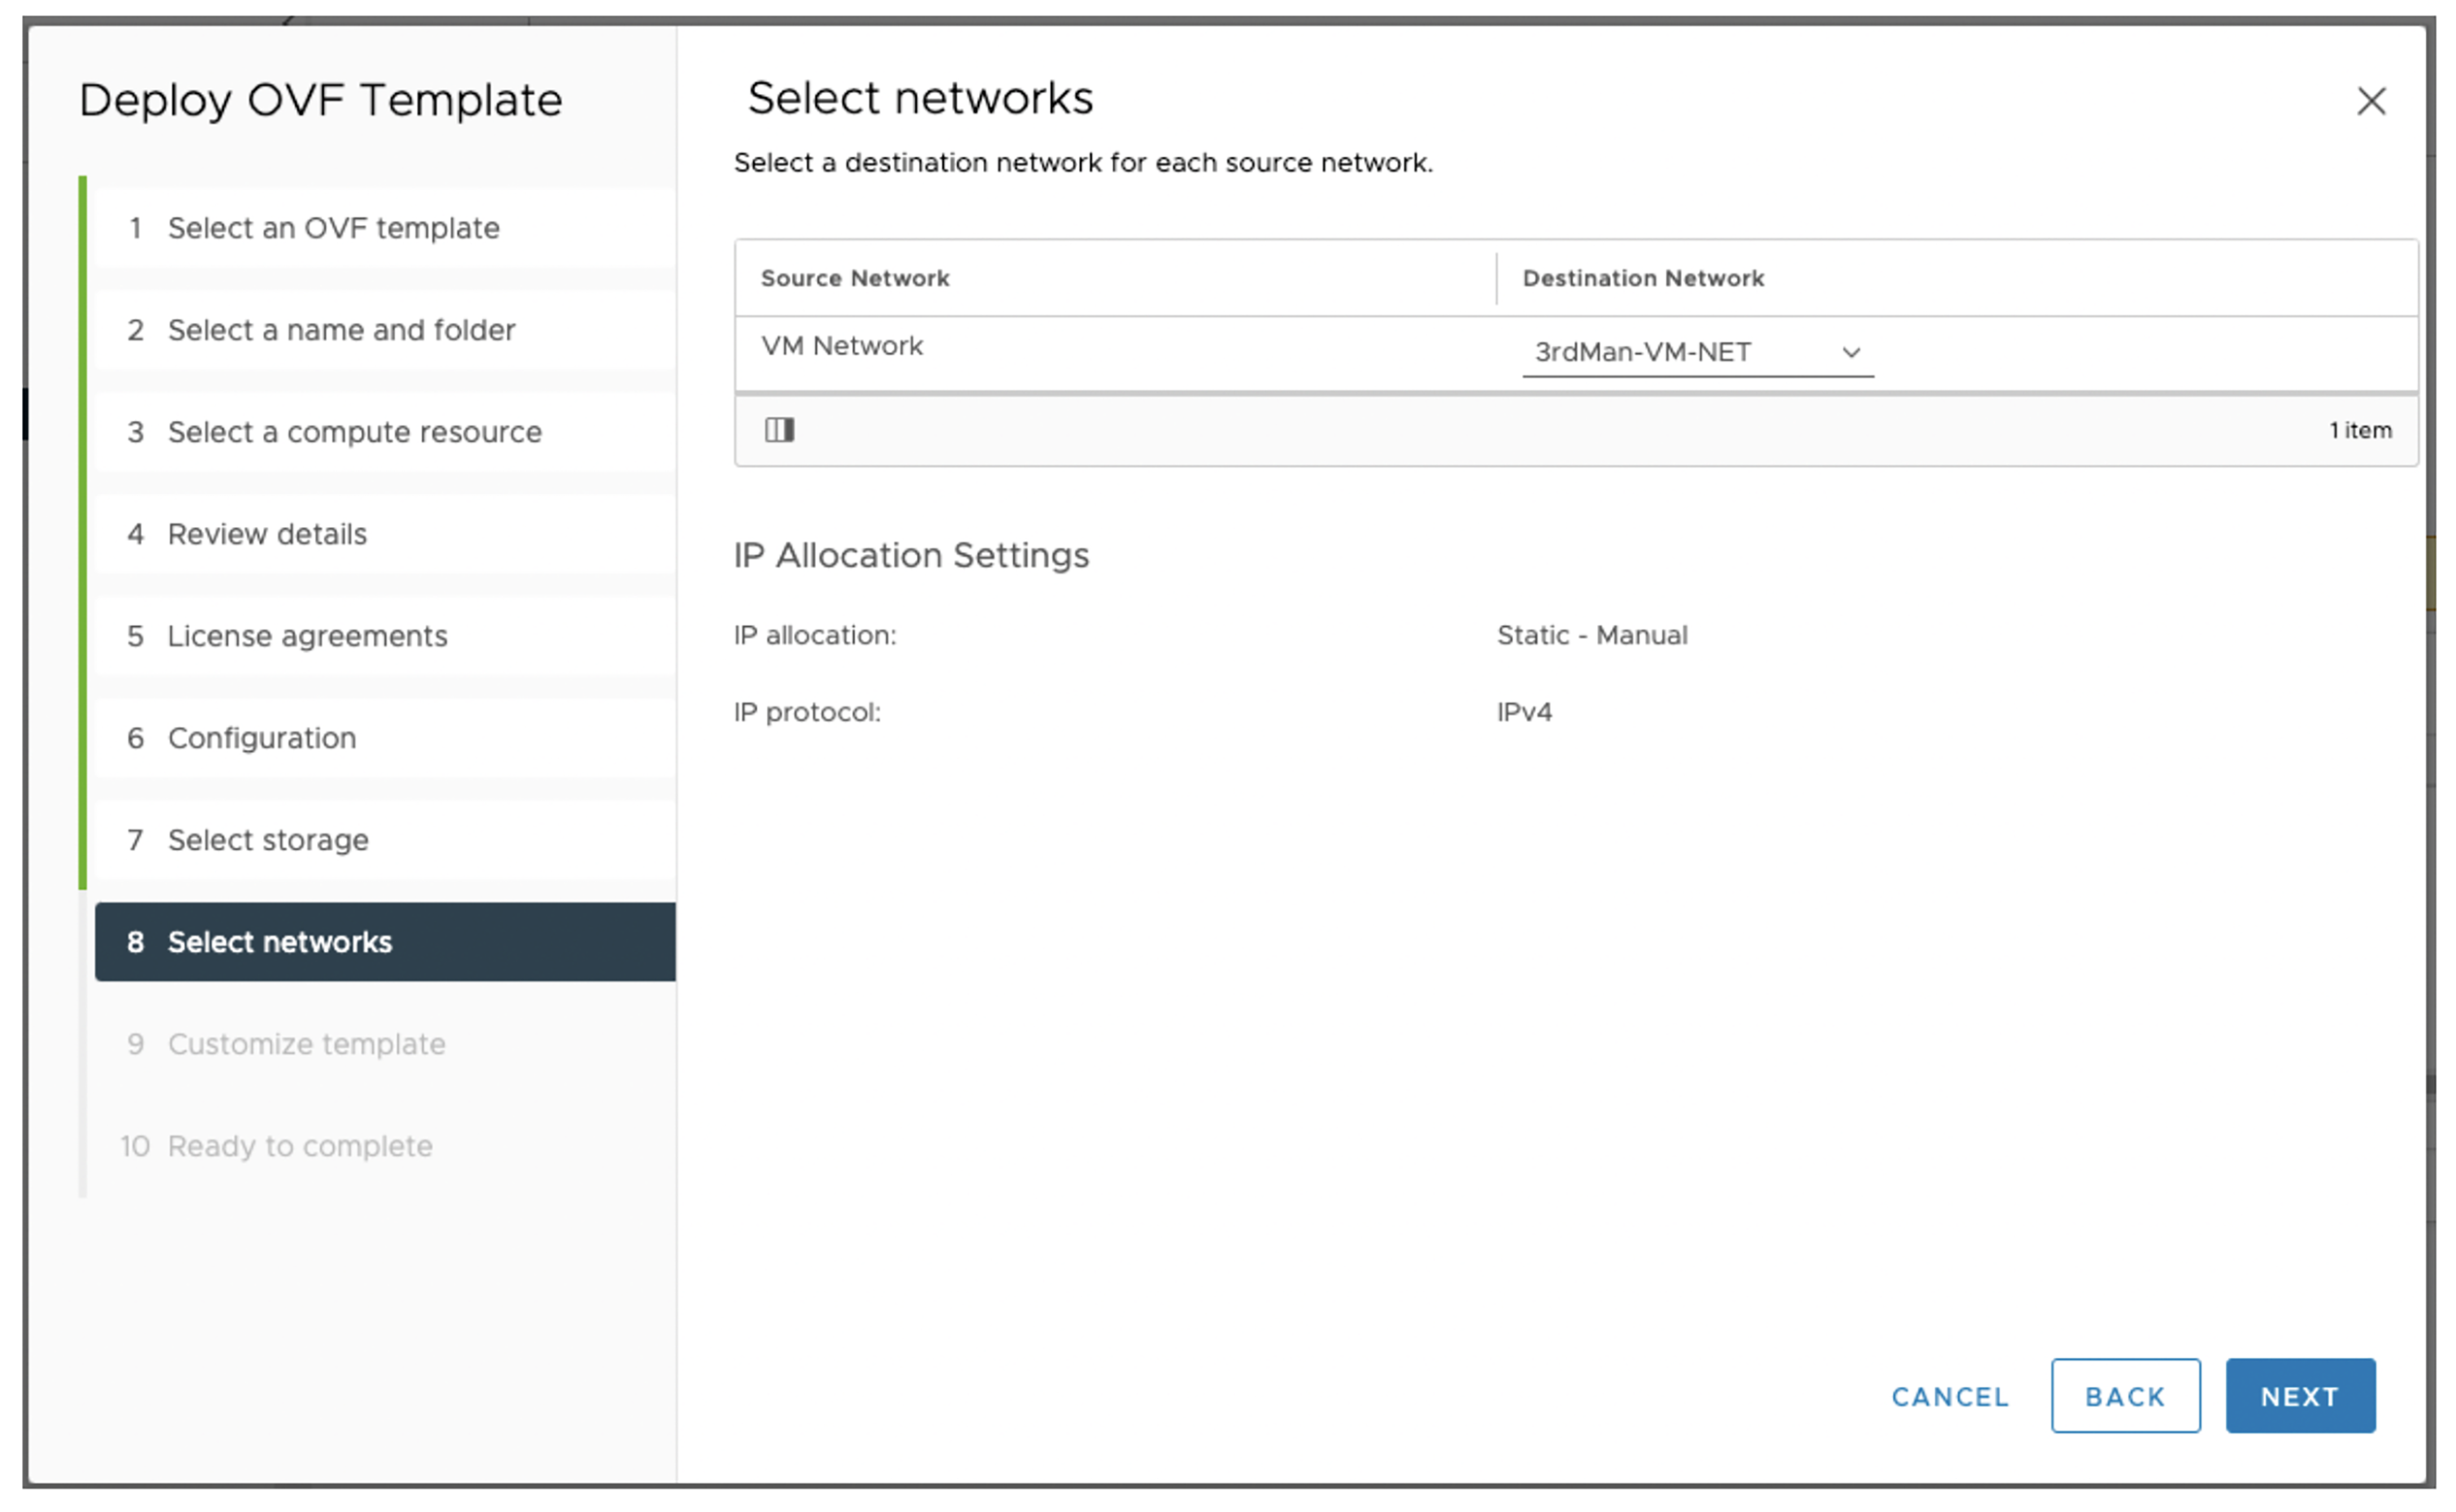
- On the next screen, you’re asked to choose the desired network where the OVA connects. You’ll see an IPv4 notion even though we’ve selected IPv6 in the previous step. Don’t worry, it’s only a display issue from the OVF template VMware provides. It does not impact the final networking settings of the OVA.
- Again, since the OVA needs to install the collector as a Debian package and the collector needs to send data to Pure Storage, we ask you to allow traffic to the following entries (details can be found here):
- *.cloud-support.purestorage.com
- The IP addresses returned from command nslookup deb.cloud-support.purestorage.com
- Again, since the OVA needs to install the collector as a Debian package and the collector needs to send data to Pure Storage, we ask you to allow traffic to the following entries (details can be found here):
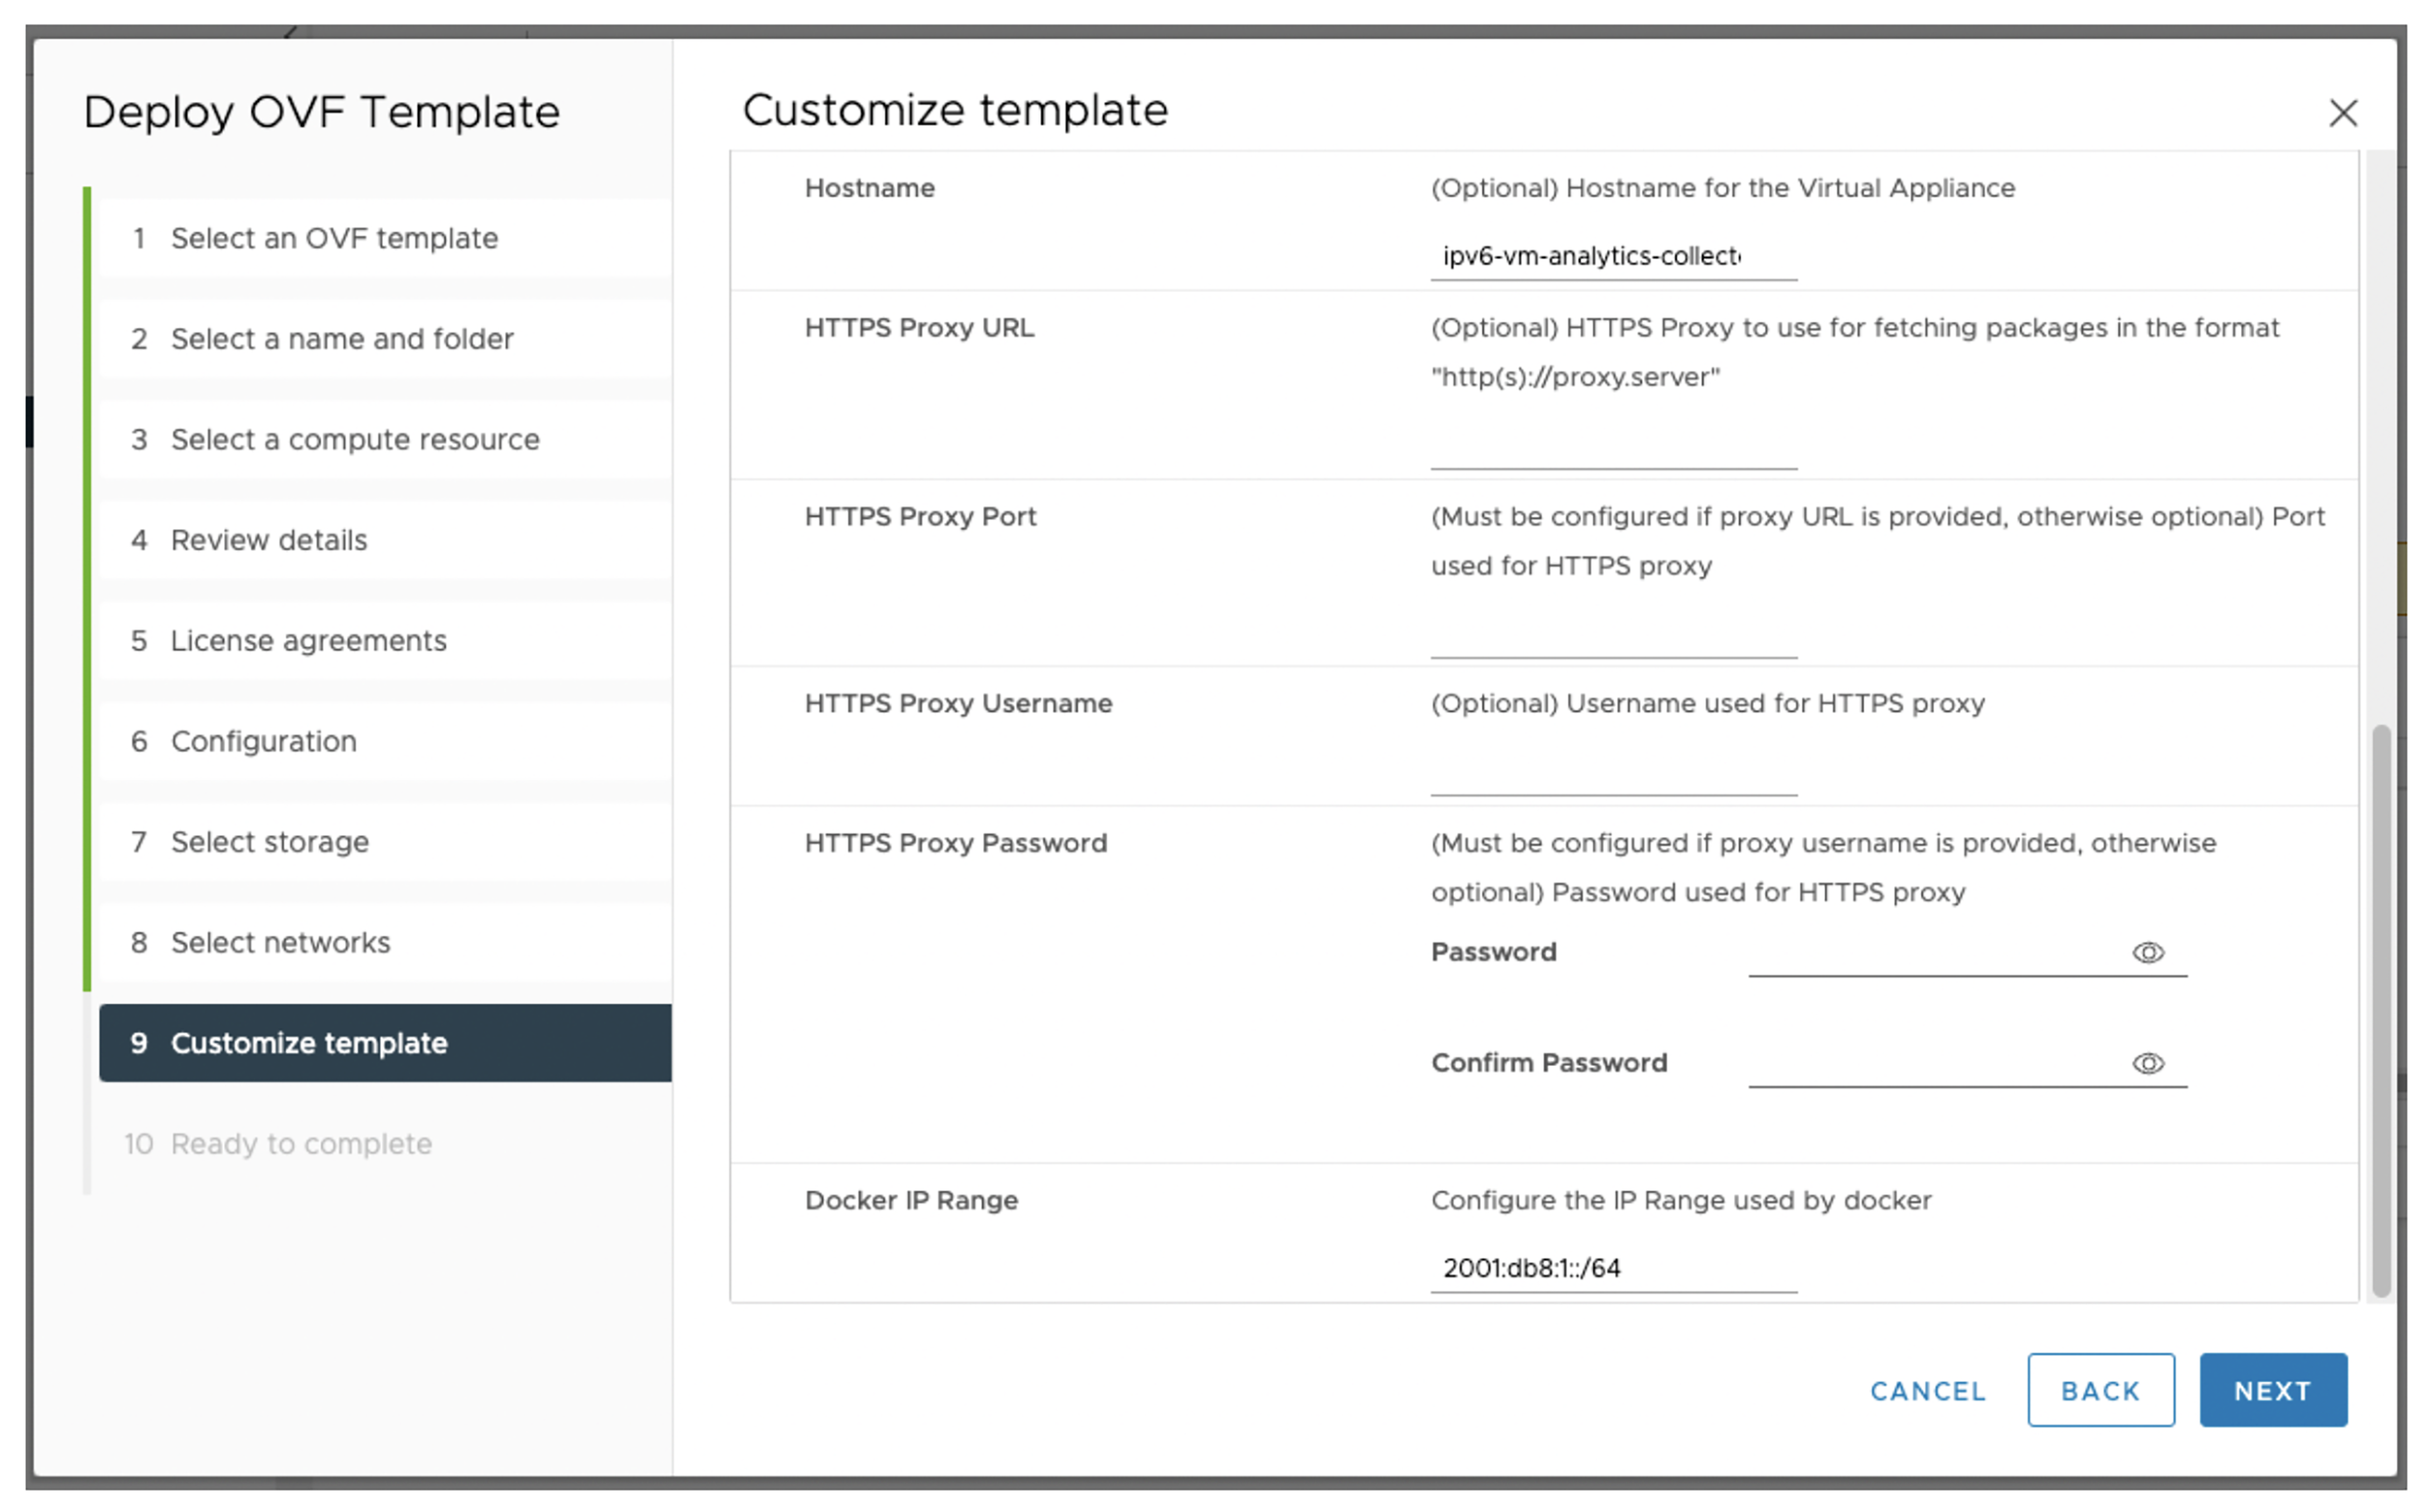
- Finally, it’s time for the IPv6 networking customization. This is where an IPv6 OVA deployment looks different from an IPv4 deployment.
-
-
- Notice that you can only select to install VM Analytics Collector as the application running on an IPv6 OVA. Other applications will support IPv6 in the future, but as of OVA version v4.1.1, VM Analytics Collector is the only application you can install.
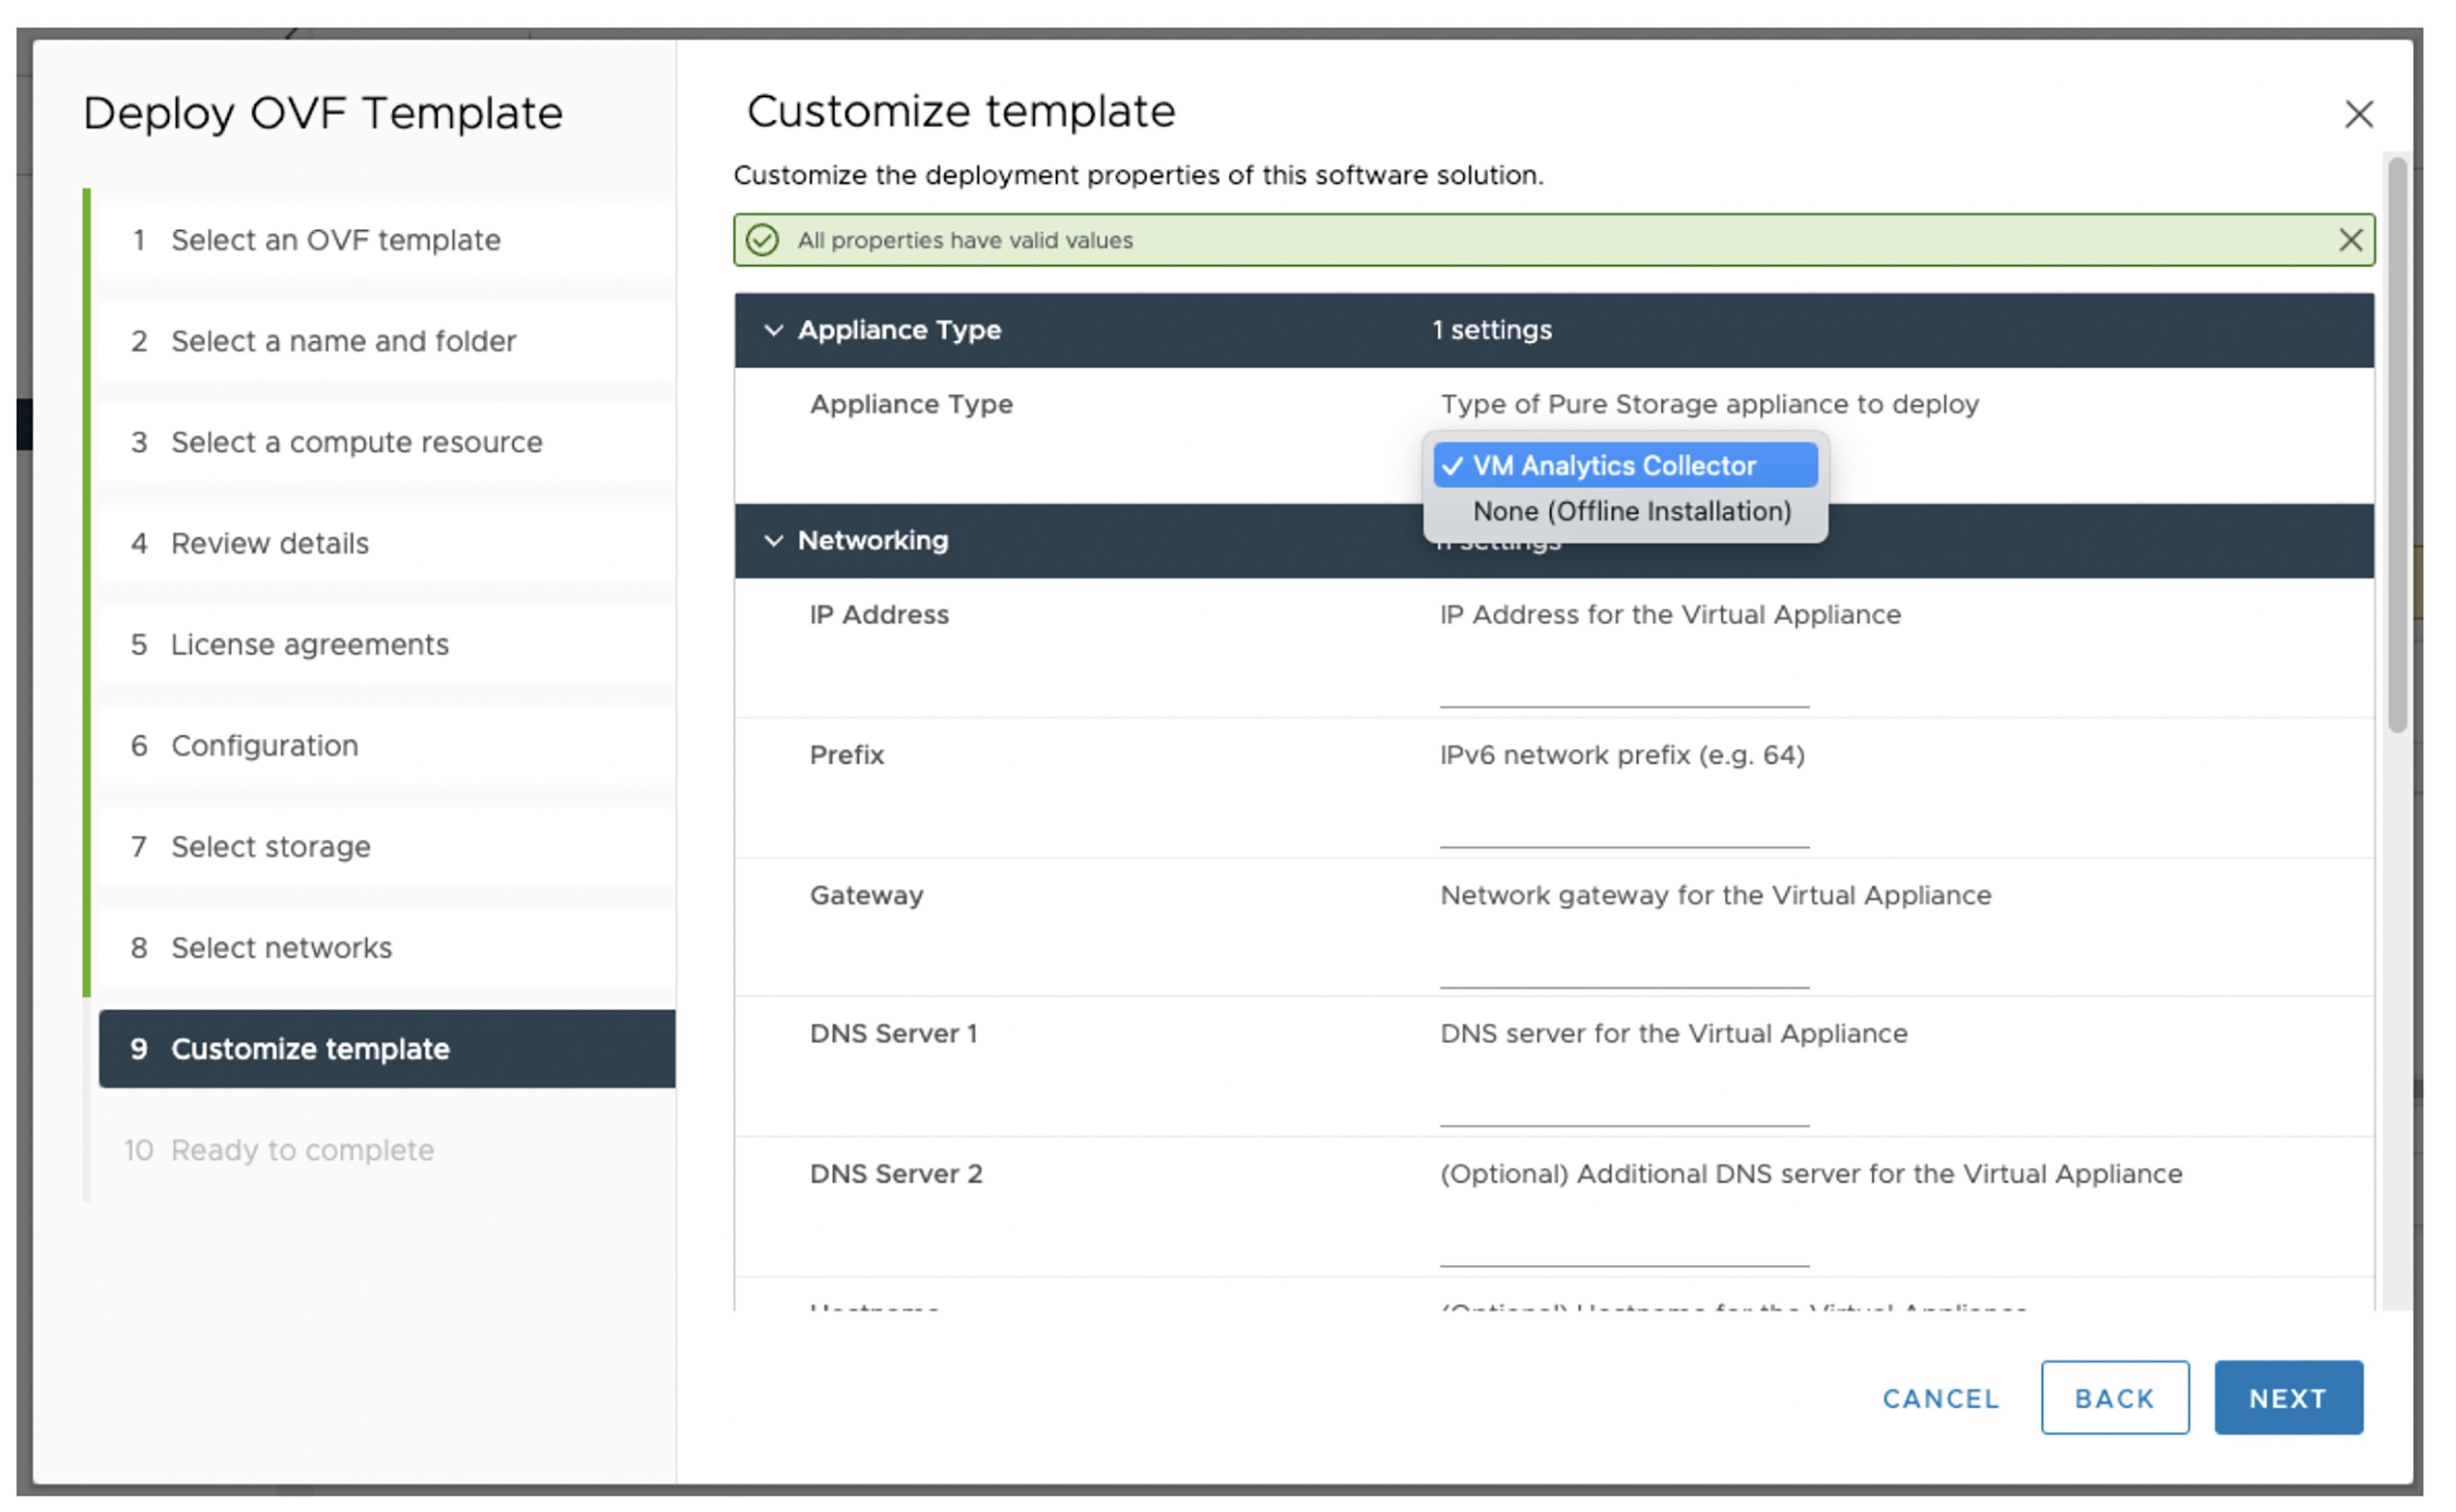
- Notice that you do not have the option to set the OVA to use DHCP with the desired IPv6 network. Again, as of OVA v4.1.1, only static IPv6 networking is supported.
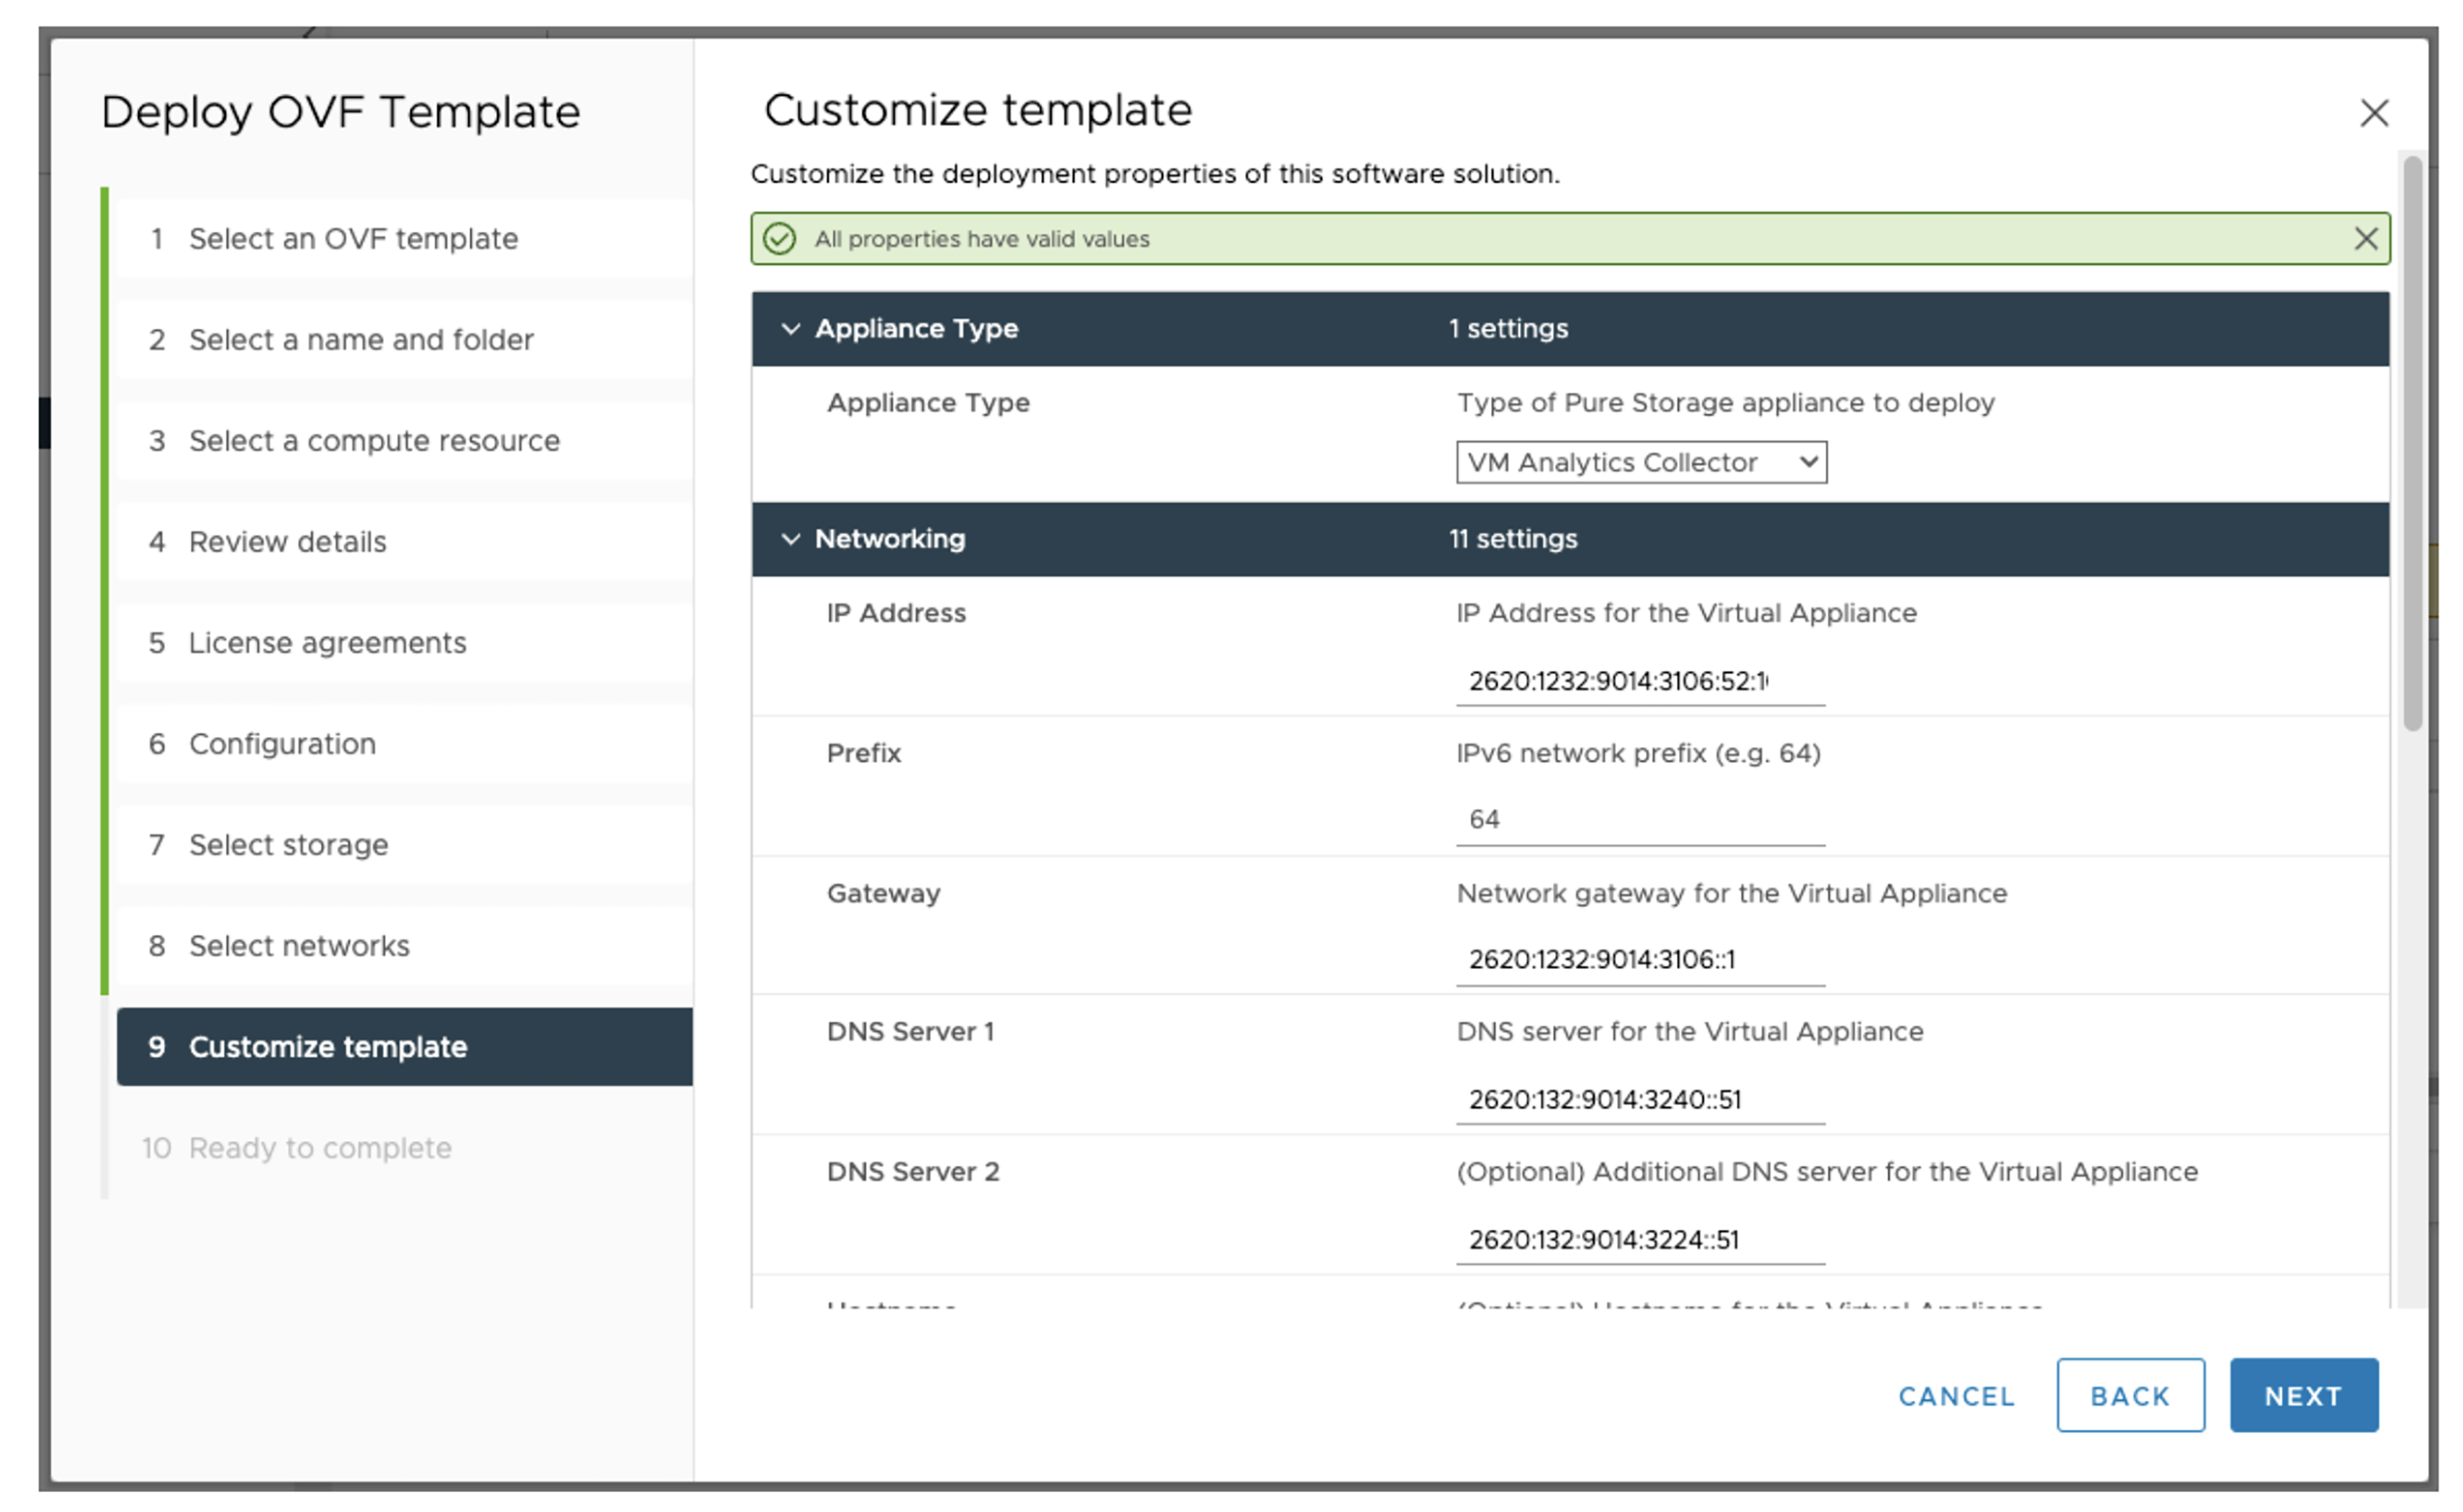
- Make sure to provide valid IPv6 values for IP address, prefix, gateway, and DNS servers.
- Similar to IPv4 deployments, you can also customize the Docker bridge network by providing the desired IPv6 value. The default value is 2001:db8:1::/64.
- Notice that you can only select to install VM Analytics Collector as the application running on an IPv6 OVA. Other applications will support IPv6 in the future, but as of OVA version v4.1.1, VM Analytics Collector is the only application you can install.
-
-
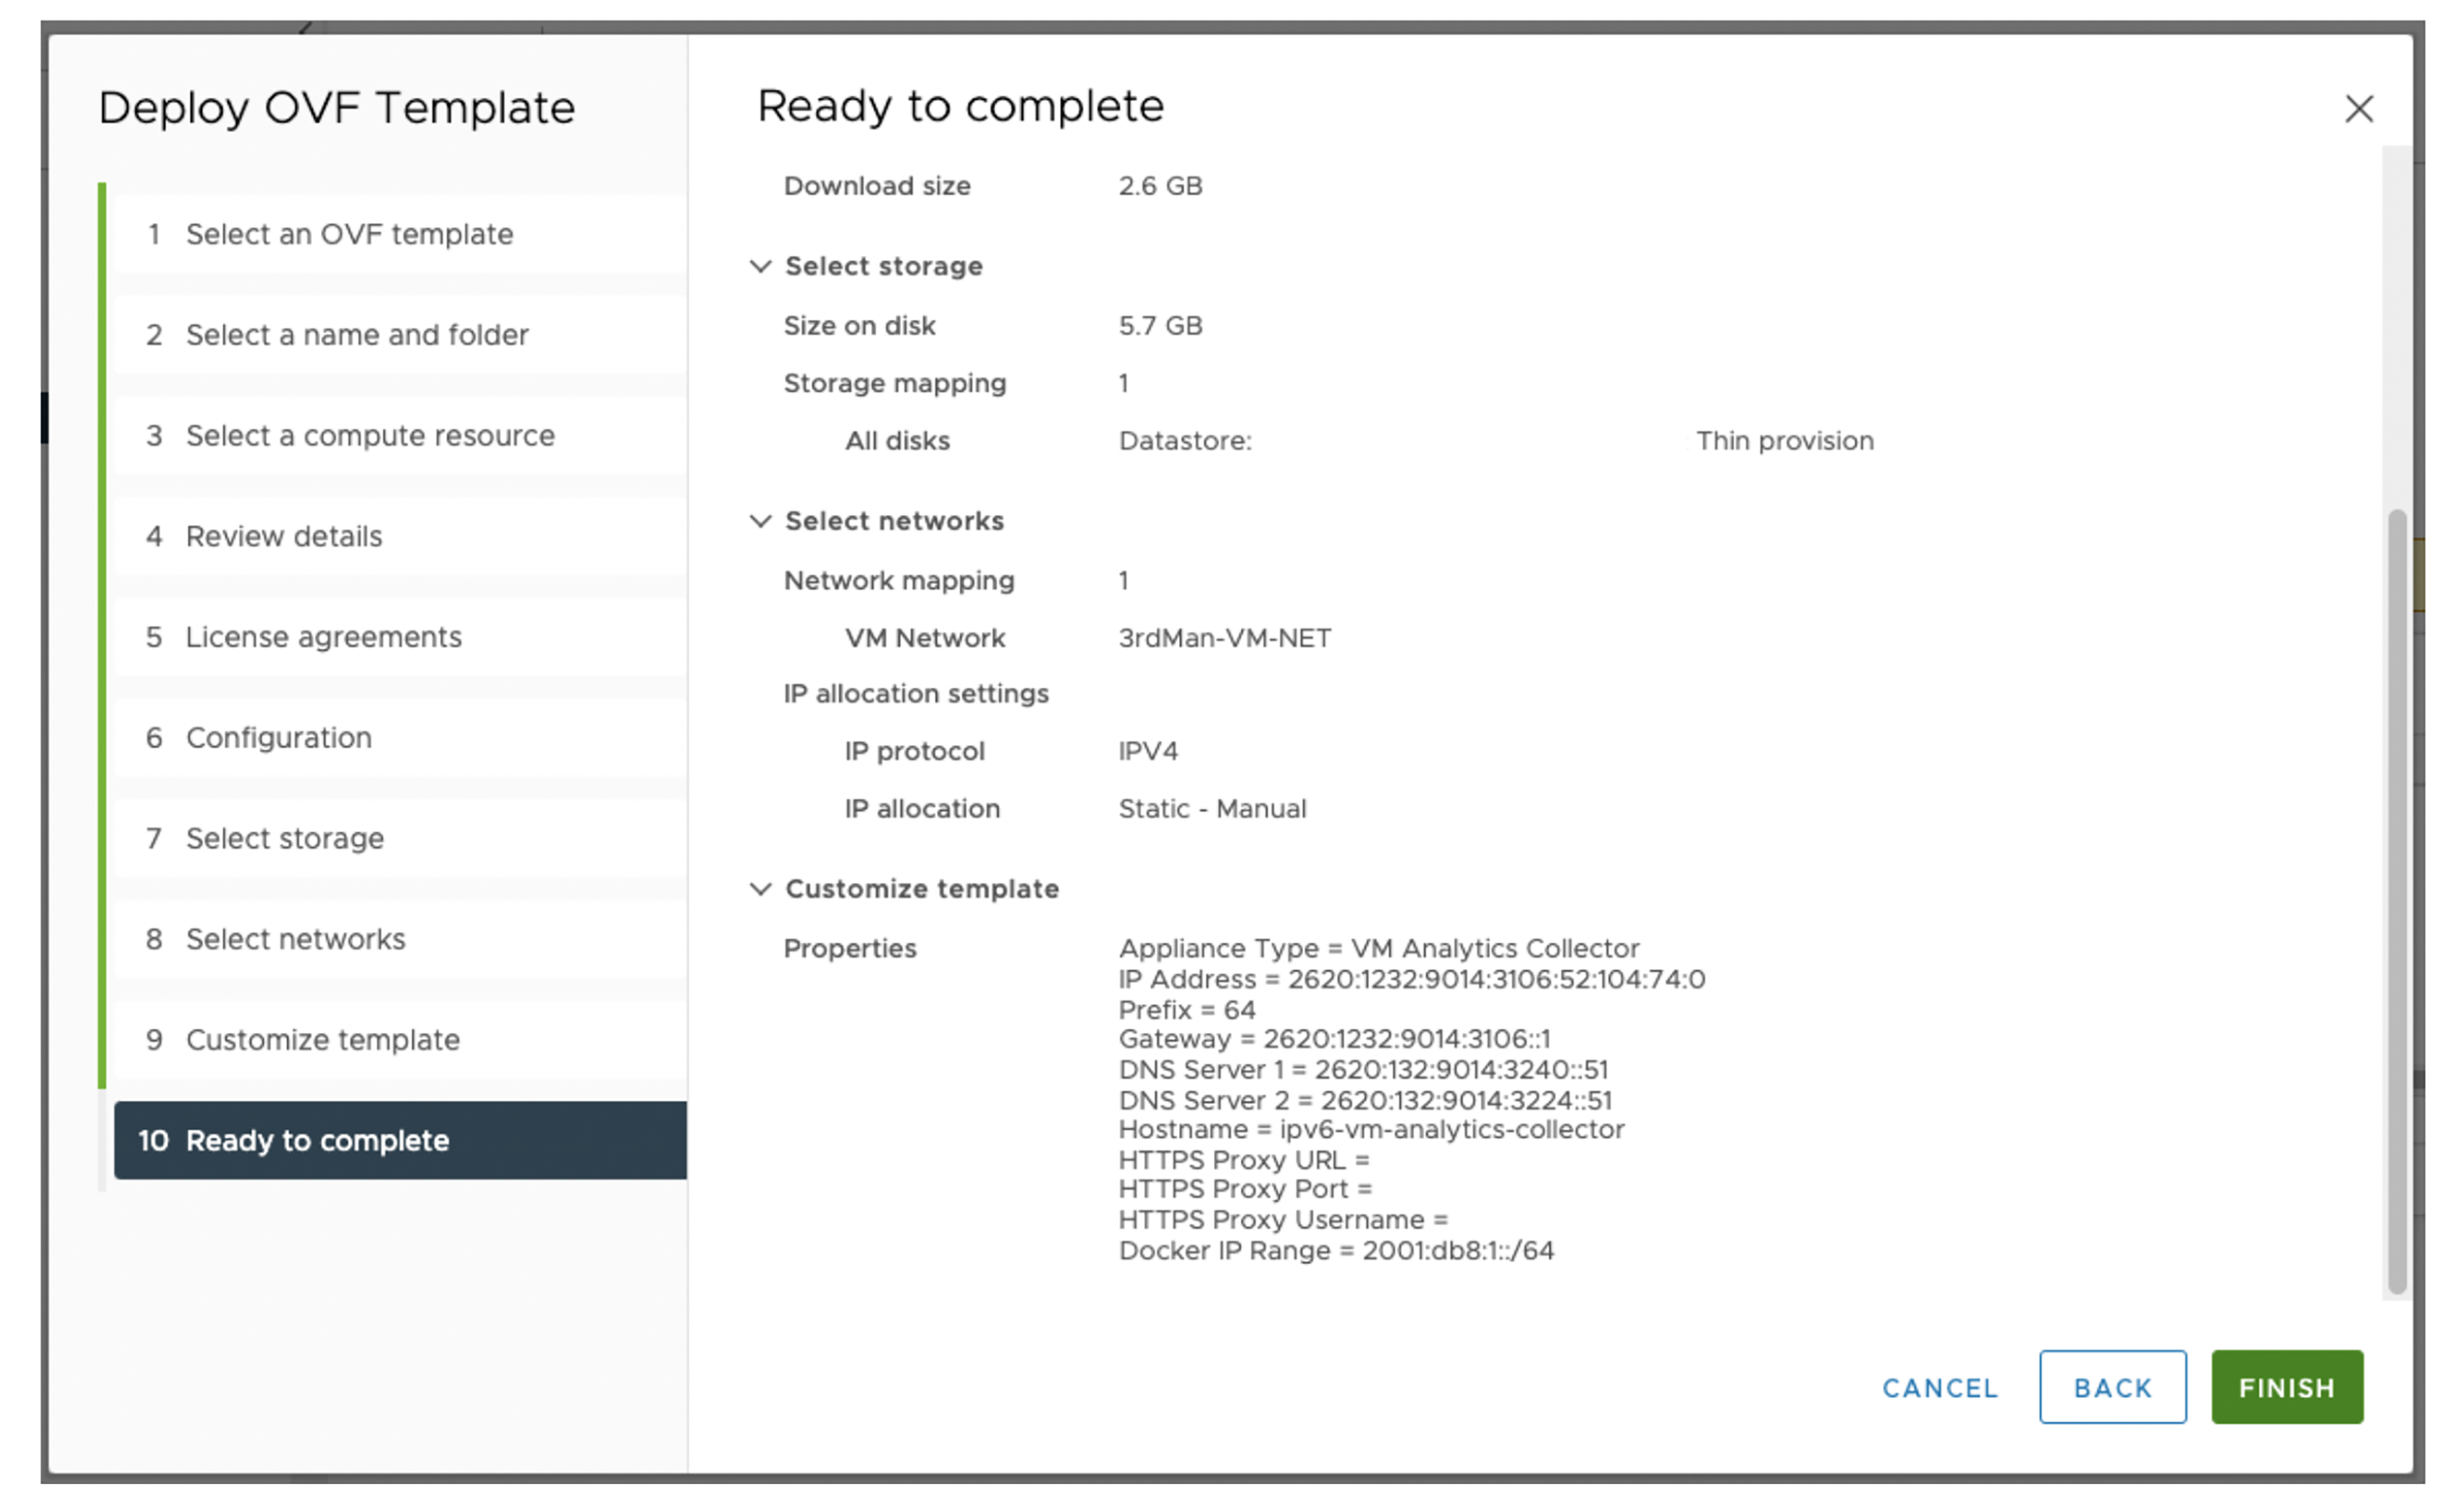
- On the last screen, you have the chance to review every step performed previously to make sure everything is good.

- Wait for the OVA deployment to finish, then power it on!
- Follow the Validate the Success of the Deployment section of “Deploy VM Analytics Collector on the Pure Storage Virtual Appliance” after the OVA is powered on.
Configure the VM Analytics Collector
There are actually no other extra configurations needed for the VM Analytics Collector application. Refer to “Configure the VM Analytics Collector for the Pure1 VM Analytics Feature” to customize your own collector. Just make sure that an IPv6 VM Analytics collector can only connect to vSpheres running with IPv6 protocol.
That’s it! The process to deploy and configure a VM Analytics Collector running with IPv6 protocol is very similar to the one with IPv4 in previous versions. At Pure Storage, we not only continuously create new functionalities, but we also always keep simplicity in mind so that our customers can enjoy them without breaking a sweat.
![]()